Tuesday, August 13, 2013

Welcome to the 2013-2014 School Year!


Hello! I am so excited to have a new blog post before the beginning of the school year. I have been working very hard with my co-teacher to create a simple and easy classroom set-up as well as routines and procedures to begin the year with a solid plan. We are both special education teachers and will have 13 students between the two of us and 2 instructional assistants each, making 6 adults and 13 students. We teach kindergarten. We agreed that since we have involved students with many needs, small groups would be the best to spend a majority of the day. We are fortunate that we can be flexible because we have 6 adults! We know the benefits of inclusion as well as whole group, so we have incorporated a lot of that in our planning and want to tweak as the year goes by after we get to know our students.
To accomplish the small groups, we have broken our classroom into 5 sections, or tables. These are based on a color (red, orange, yellow, green and blue). Each table also has a food associated with it (apples, peaches, bananas, grapes and blueberries).  The food groups are called the "Home Base" groups which do not change throughout the year. One adult (and one table sharing an adult due to instructional assistant break schedules) will be assigned a food group and 2-3 students will as well. These groups will be at the appropriate colored table for their food for the entire year for "hello groups" (breakfast groups), science/social studies, and "goodbye groups" (snack/dismissal) (We call them hello and goodbye because some students don't eat regular food and have different feeding times so we will plan a hello or goodbye activity for them to participate in, instead of waiting around for peers to finish eating). Then, the colored tables will also be centers. Each table has 2 AM centers (reading/writing) and 1 PM center (math). Adults rotate the centers weekly (for example, if I was the red table one week, the following week I would be the orange table, seeing 2-3 kids Monday, 2-3 different kids Tuesday, 2-3 different kids Weds, 2-3 different kids Thursday and 2-3 different kids Friday-eventually seeing each student 1x/week assuming they are not absent any days). The two teachers (myself and my co-teacher) are always green and blue for everything (each day, each center) for simplicity sake, so instructional assistants rotate between red, orange and yellow. The students in each group change daily (stay at the same table in the AM and same in the PM for transition sake and then rotate to another color the following day). Whatever adult is at a table for the week they complete one activity 5 times with eventually all of the students. So, my co-teacher and I basically plan a red AM and PM center, an orange AM and PM center, and a yellow AM and PM center for the week and the kids rotate through. Less planning, all the students get to all of the material, you aren't running around a whole group making sure everyone completed everything, therapy pull-outs, etc.
It is helpful that my co-teacher and I are always green and blue and our time is "flexible" to allow for IEP data, assessments, possibly inclusion in typical kindergarten, etc). It may seem confusing but I have included a lot of pictures to help make it understood.
Welcome to our classrooms!


Here is the door where I will post bus numbers for both classrooms (because we will be in our "Home Base" food groups for snack/dismissal, students from both classrooms will be exiting down to the bus)

To the area directly to the right of the door I have created a "calm down corner" for students who are having trouble during the day. There is a small desk and a cart filled with individual work tasks (a lot of fine motor). I believe that students may need a break when experiencing behavioral issues but I also don't want that time to be too reinforcing (which is why I have the individual work tasks for them to complete). Still doing work, but able to talk it out, get a reminder of the expectations, learn how to try again, and regain their composure. The location also helps with students who enjoy flipping on and off the light switch :-)
To the right of the "calm down corner" is my SMARTboard area and you can also see the classroom library. I made a hula-hoop shower curtain reading area with a mirror and bean bags.

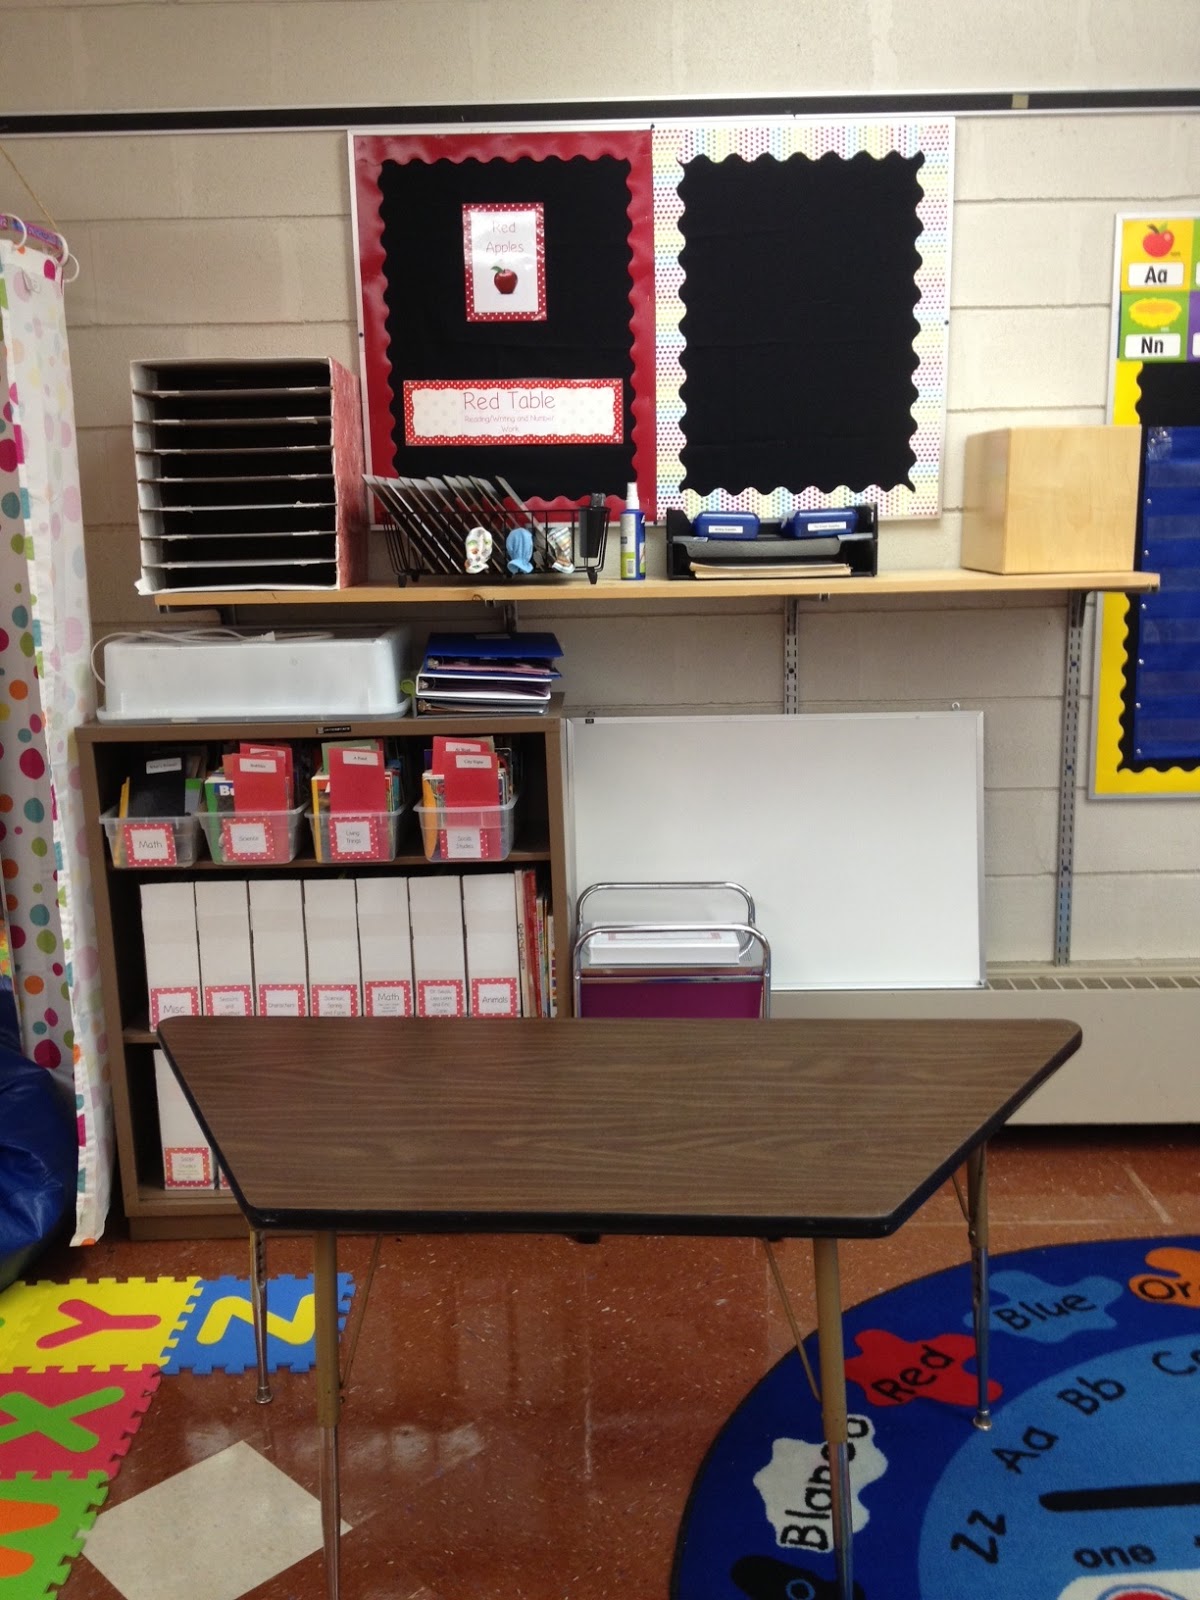
Right by the classroom library is our first center table! Home to the red apple table! As you can see, each table has a binder that clearly labels what the 2 AM center topics are and what the PM topic is. Each table also has a cart or drawers of some type, one drawer housing the feeding equipment (for the red apples hello and goodbye groups), one drawer housing AM center materials and one drawer housing PM center materials. The binder includes IEP goals for the topics for each student as well as alternate activities to do when plan A just doesn't seem to be working, which never happens ;-). All of the materials are kept by that center. For example, with this center, we made it close to the SMARTboard for writing work, close to the big dry erase and small dry erase boards, writing materials are right there on the shelf above, reading books/reading nook, etc. Oh, and number work has SMARTboard activities too!
To the right of the red table is my group center time. I am the group teacher for reading and my co-teacher is the group teacher for math. We will start off the day in her group area doing math tasks (calendar, who is here today, daily schedule, weather, number of the week, etc), then break into AM reading centers, go to my room for group reading (letter of the week, word of the week, alphabet, story of the week, etc), then go into AM writing centers, lunch/recess/specials, quiet sensory time, PM math centers, sci/social studies whole group (rotating between my co-teacher and I Mon-Thursday) then complete the task in small home base groups, then goodbye groups and home. On Friday instead of sci/social studies we do an inclusion activity with typical kindergarten and for the first couple months, a color parade around the school for the color of the week.
As you can see, since I am the reading group teacher, I have just reading things in my group circle. I have the alphabet, a pocket chart for letter of the week vocab, letter of the week, color of the week, word of the week, classroom rules. My big books are organized to the right with story props underneath and circle time supplies in the rolly cart. There is also an easel for stories and felt.


To the right of that is my exposed shelving, all cleaned up and organized with new labels! I wanted all the same bins so they stacked the same and all the same labels for easy access. The adults are the only ones grabbing these bins so they are just in writing and no pictures. The picture labels I did last year seemed cluttered and not very useful. It took just as long to look in the clear view so the labels weren't helpful. These are bigger and easier to read from a distance. I also put all the craft supplies to the left, math in the middle and reading to the right. On the top I have my fall, winter and spring/summer bins. Other storage too (fridge, swing, etc).


This is another angle next to the puzzles where the big toys are kept.


  To the right of that is dramatic play. Even that is organized!
To the right of that is the green table-my table! Instead of binders we have bulletin boards. You can see mine hanging. I also have the expectations hanging on a ring (the same for the classroom and all centers-4 simple rules) and a magnetic timer for data. We will have IEP binders for each students with data sheets in them so blue and green tables will use those.
Here is a close up-I made the clipboards with printed duck tape.
The back of our clipboards and the back of the binders have the same behavior chart on them for the use in small group time. We made it simple because each kids consequence and reward is so different. All of the students velcro names are located at the center so once you begin your center you can say hello, find names, put them on the group names section, review rules and behavior plan, etc.

On both of the barn doors (left open because we are using both rooms this year) to the right of my green table are a space saver pocket chart from Lakeshore (love the size-it was perfect for my things!) I have our color of the week, our theme of the week and a place to post my essential questions based on common core extended standards. We have already gone through and made a theme and book for each week and the colors go for a couple months then we are toying with the idea of doing shapes of the week. On the other door is a home base chart. Remember, these do not change throughout the year so they are just posted here.

To the right of that is my student computer station. We are supposed to get new computers before school starts-keeping my fingers crossed! I have everything out, intellikeys, EZ keys, speakers, etc.


To the right of that, behind my teacher desk is the orange table. This table is reading center letter work, then writing center typing and then math center counting. So, my classroom has the red table, green table and orange table. The yellow table and blue table are in my co-teacher's classroom which is semi-open to my room with the barn doors. 


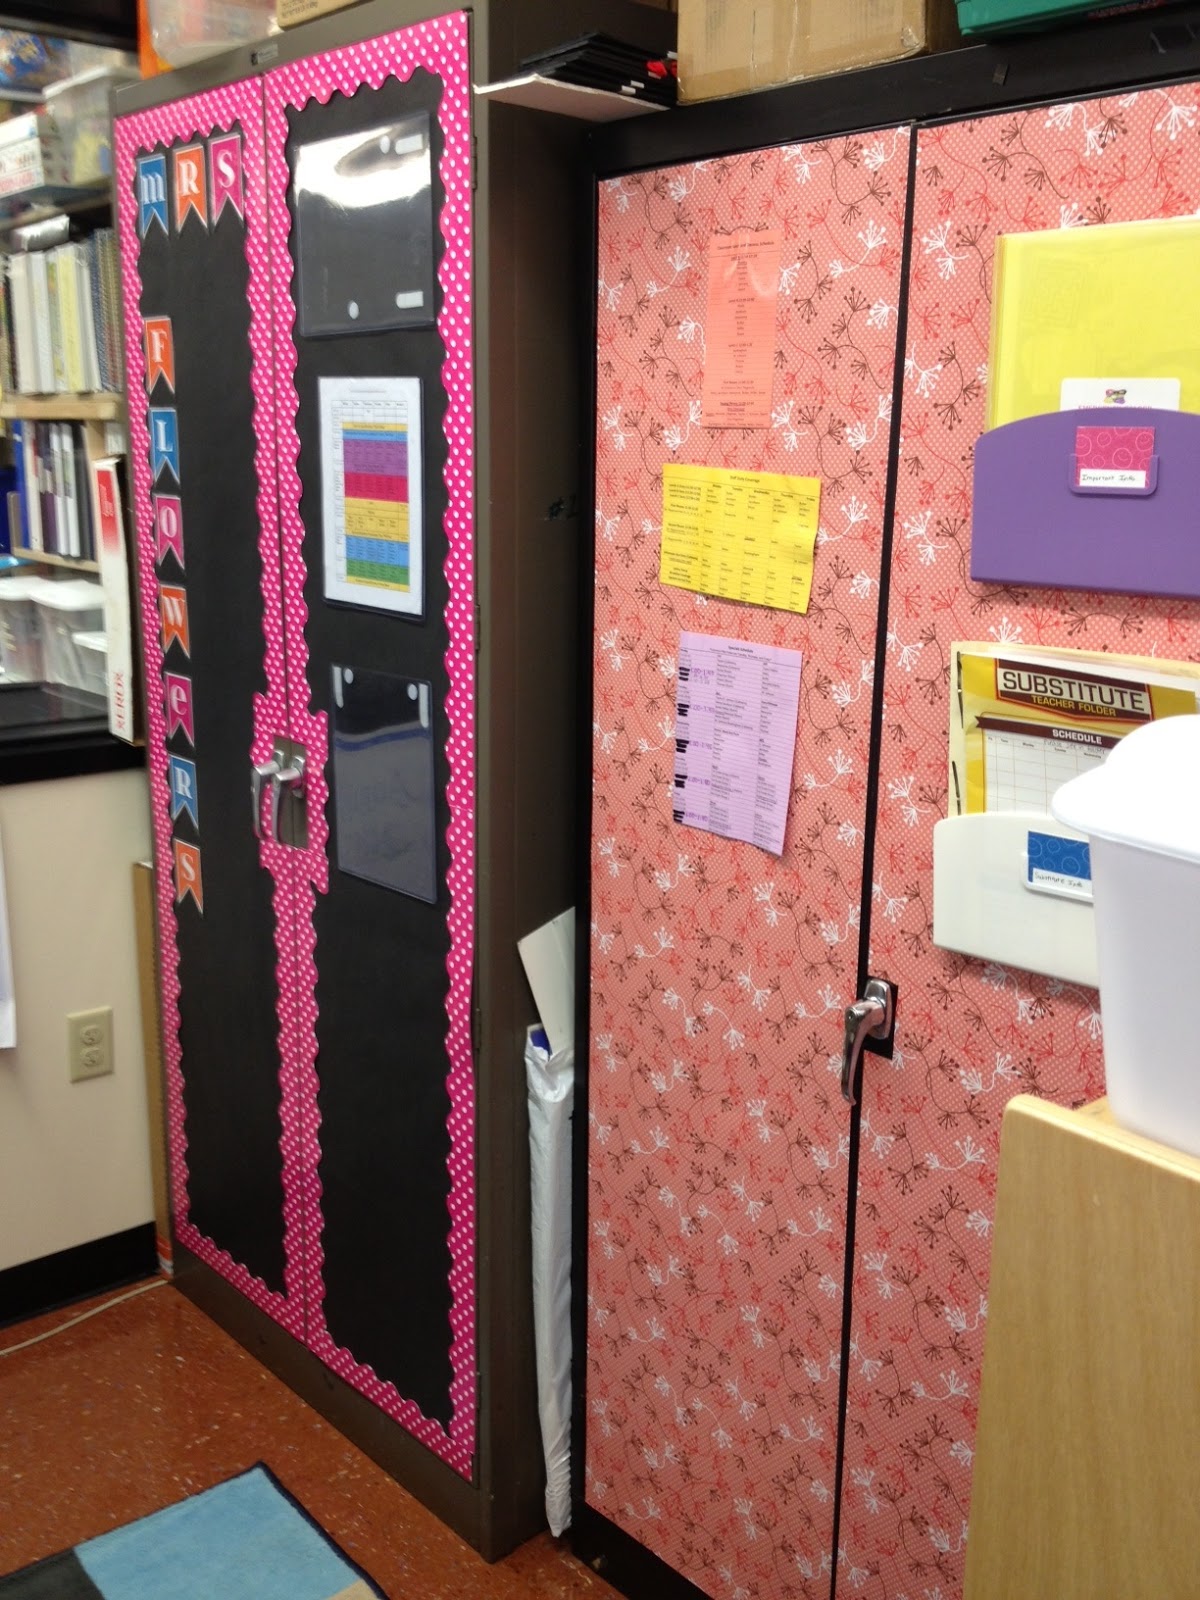
Here is my teacher area. It has a semi-private entrance off the cubby area so students won't be tempted to come inside. Two big filing cabinets line the inside (I should have taken pictures of how I organized them! next post...) and they have different schedules and information posted on the outside. I have my monthly lesson plans by the printer. 

Then, here is the cubby and sink area next to the door. Now you have seen the entire classroom!


Here is my co-teachers classroom. She hasn't set up everything yet but she has an amazing group area space for math group time in the morning! That chart you see in the background is our daily and weekly center rotation (see close up below)


She doesn't have her blue table set up yet but here is her clipboard.


Here is the yellow table. This table is my favorite because it is listening and sensory. My co-teacher has the most excellent sensory tools, light boxes, visual stimulation, switches, etc. etc. etc. 


Here is our center rotation board. The clothespins are students names that rotate daily. The colored boxes refer to the colored table. The top half is AM, the bottom half is PM. Once we figure out which IA is where, we will fill in with velcro names the red, orange and yellow and rotate those weekly. We are also going to add break times to this as well.

I hope you enjoyed my classroom tour! I have been so excited to post this. Please let me know if you have any questions and please comment! I love comments :-)

Here's to an excellent school year and best of luck to my fellow teachers!

Saturday, May 18, 2013

Pizza Box Drying Rack

Hello! Here is a Pinterest project that I recently did that will be helpful in my classroom! We do a lot of projects that require paint, glue, things that need to dry and we don't have many surfaces in my classroom, so I decided to make a drying rack! This project cost me less than $2.00 (for a 3 oz can of spray paint) and I made two of them. Granted, I already had white duck tape, clear packaging tape and pretty contact paper, but those things are pretty inexpensive.

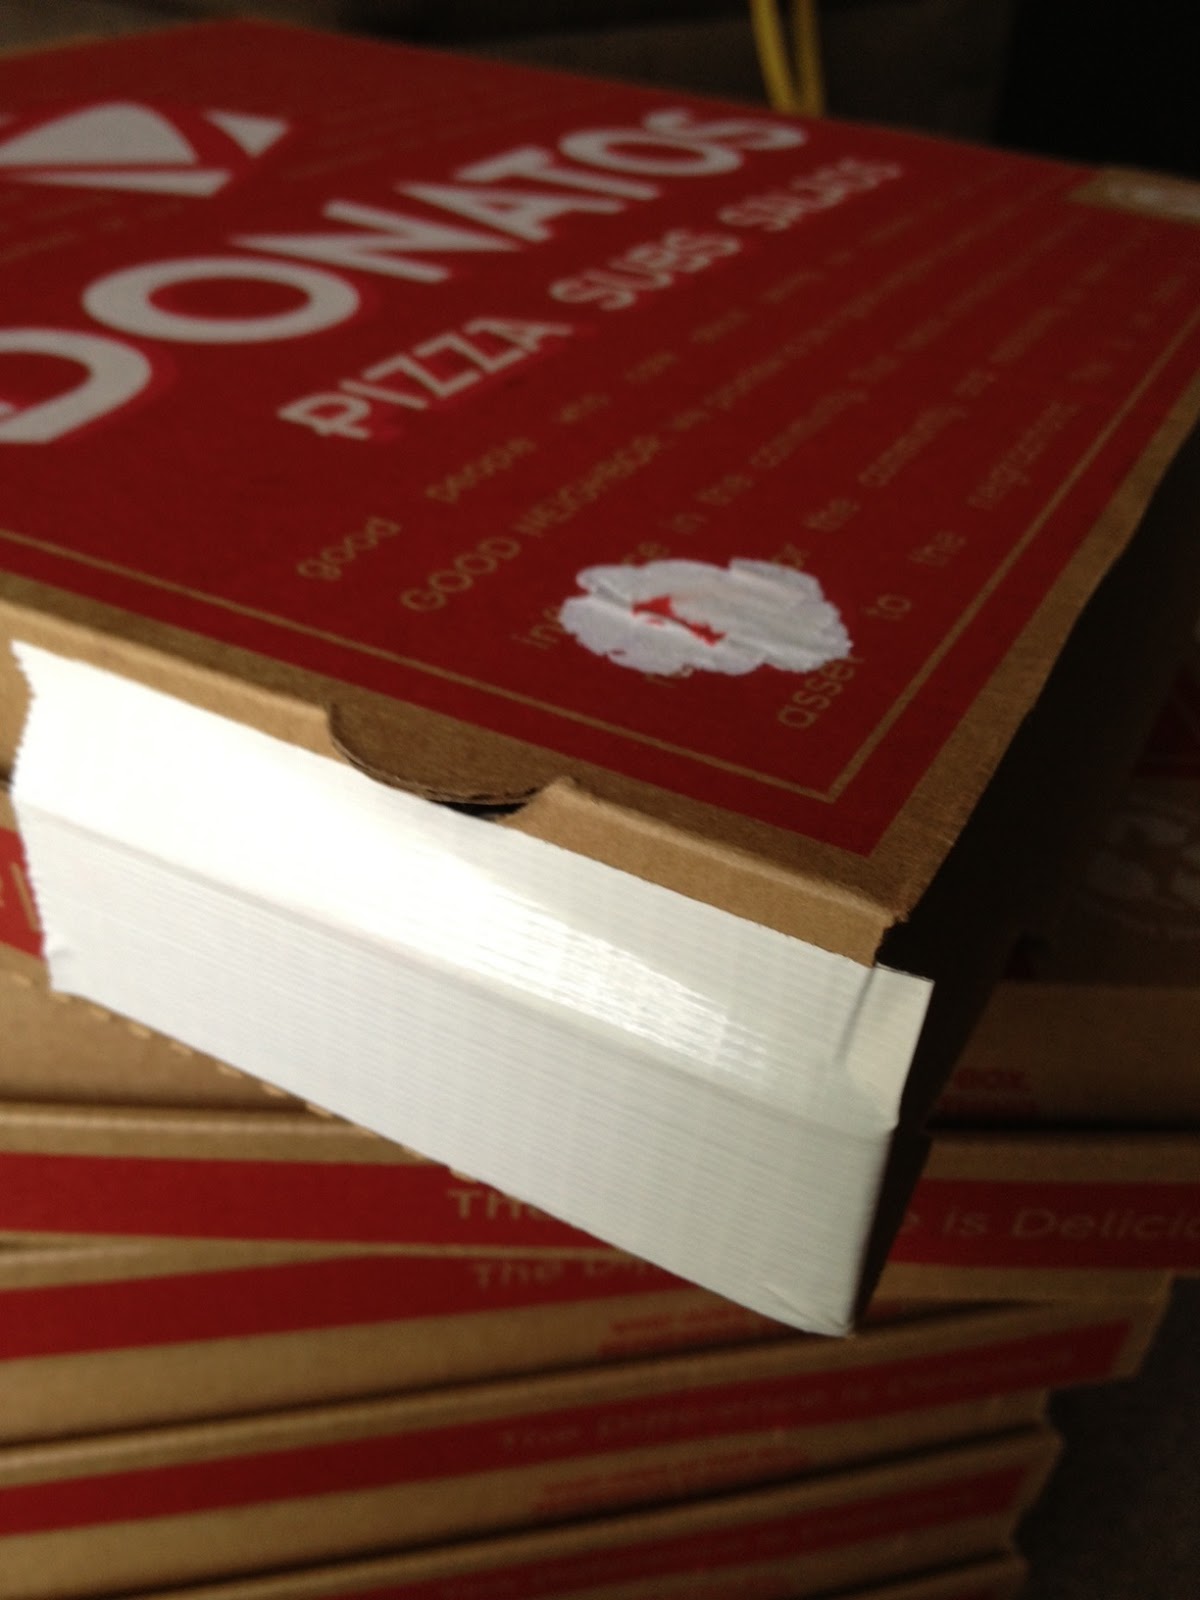
I went to Donatos and they were very nice to me and graciously donated 16 pizza boxes to make two drying racks with 8 slots each. Thank you Donatos!

You have to cut the entire front off. I expected it to be just a flap and be super easy, but Donatos boxes are folded and tucked into flaps so it took a bit longer and I had to be careful. I saw on Pinterest they used Little Caesars? Maybe their boxes only have the flaps.
Then I tape the sides using duck tape. Once you take off the front flap, there is nothing holding those front sides together.

Here is how they looked once I completed that on all 8 boxes.

I tape them using clear packaging tape. I tried to make it as smooth as possible but it was hard. I started by taping them two at a time, then stacking them and taping the pairs, but my husband did the second one and I think he just taped them in one big loop.

I added duck tape and extra support from those cut off front flaps on the top and the bottom.

I covered it in pretty contact paper you saw in a previous post! And, I sprayed the inside with a thin layer of white spray paint to lighten it up, but I wanted to make sure it wasn't thick and sticky inside.


The lighting isn't the best, but it turned out well!


Monday, April 15, 2013

Spring has Sprung!

We have been working on the 4 seasons, weather and recently, spring and plants. Here are some of the things we have been working on! I apologize that some of the pictures are sideways :-/

We did a unit on the four seasons, identifying the months in those seasons and the weather conditions and range of temperatures we see at those times. I made this felt board tree that we manipulated with during our conversations and books about weather/seasons.

Summer Tree

Fall Tree


Winter Tree

Spring Tree

Here is just something I made for outside of my classroom so people knew where we were. I used velcro to attach the specials and its dry erase to change the times.


We did a Very Hungry Caterpillar Unit which is always fun. So much counting, identifying days of the week, identifying fruits, colors, butterfly life cycle, etc. On Friday we made a Very Hungry Caterpillar fruit salad, tried all the fruits the caterpillar did in the story, then mixed them all up to a fruit salad. We were almost late for the bus it was so delicious! A big thank you to my amazing speech pathologist who let me use a lot of these resources! We used those little fruit popsicle sticks as our "recipe" for fruit salad. I had them all in a basket and each student got to take turns pulling them out and reading me the recipe: how many and what fruit?

Currently, we are doing some plant experiments, learning about the plant life cycle and watching growth. Our current experiment is what do plants need to grow? We are tracking the growth of four different beans: one with sun and water, one with only sun, one with only water, and one with neither. Which one will grow? We are going to chart on our graph once they start sprouting.

Here is a cute printable that I laminated. I will use this during our counting stations on Thursday afternoons!

We are making grass heads and identifying parts of our bodies. Plants are living just like us! Once the grass grows, it will look like hair. A cute, but sometimes confusing analogy ;-)

Back to seasons, I made this sort with a common icon. First we colored all the icons the corresponding color, then added them onto our colored mat to see which months were in which season. It was a really cool way for the kids to understand the topic.

We made season wheels from plates. I loved these black plates for high contrast. We had a ton of leftovers from a City BBQ party. This also linked in with our felt board tree at the beginning of the post.


We did a bit about kites while talking about weather-wind. There is a 5 Little Kites felt board story that I made characters to. We did experiments: Will the wind blow it? and used a fan to blow different classroom objects and observed if the wind was able to blow it or not. Here was a fun math game that we played. As you can see, each one is differentiated. We used the dice that you can see in my previous post from January-March. Students had to roll their dice then find that number on their kite, color it in. The first person with all their kite colored won the game.

We read a story about a bunny and talked about the main character. Then we made him with paper plates, cotton balls (fine motor-we pulled them all apart and we threaded the pipe cleaners through the back of the plate), added eyes, nose and ears.


We focused on eggs, spring and bunnies and not Easter for obvious reasons. So we wrote a class poem called Wake Up, Spring and each line was Wake up, ________. They had to choose an egg and open it, identify what was inside and help me try to spell it using our knowledge of letter sounds. I had different objects in the eggs, ones that we have talked about in recent units and CVC words that we know (pig, dog), etc. Then we read our poem and made our own spring wreathes, see below:

I used paint chips from Home Depot to cut out pastel eggs and they got to choose some, glue them onto this spring paper plate that I cut the middle out of, and glued on pastel marshmallows on after counting them out.


January-March (but February got lost!)

Here are some of the things I have been doing the end of winter and beginning of Spring. I am not sure why I didn't document much in February. Must have been a busy, short month!!

January:
We worked on the snow theme and made some cute snow globes with marble paint (put the foam snowman cut out onto these cute snowglobes I made out of construction paper, put them in a box lid, and put marbles dunked in white paint in and shook to make it snow!)
We also read a story that was hand made by a speech pathologist I met and it was a sequence of making a snowman and adding the things he had on him. Students sequenced the story using different cut outs, we also did shaving cream and glue snowmen as a sensory activity:

Dr. Seuss:
I did a lot of the common themes, Cat in the Hat, Cat in the Hat Comes Back, Green Eggs and Ham, Fox in Socks, The Foot Book, etc

For the Cat in the Hat, they made their own hats following the AB pattern, white/red, etc. We identified characters and events, etc. For The Cat in the Hat Comes Back, I made an alphabetical order activity that is just like the book:
We also did the Foot Book, measured our feet by tracing them and counting out Unifix Cubes:
We did Green Eggs and Ham-we are working on shaking head up and down for yes and side to side for no, we also made green eggs and ham using vanilla pudding, green food coloring and a vanilla wafer in the middle as the "yolk". Here is a switch we used while reading the story:
We also did One Fish, Two Fish, and sorted out colored gold fish. We made some counting flip books using Dr. Seuss stickers.

St. Patrick's Day/March:
Sorry these are sideways and/or upside down:


Here is a game called the Shamrock game that focuses on simple counting 1-10. We put the large dice in a big bin and shake it, then stop, because students had a hard time rolling the dice. They have a marker of some type (we use little counting bears as their markers) and they move the amount they rolled, so they are counting 1:1 and then counting up to a number and stopping. If they land on a Shamrock, they get a Shamrock card. As soon as all the cards are gone, the game is over (makes it easy for you to control the end of the game). Whoever has the most Shamrock cards wins.

I printed this cute scavenger hunt off online and the kids love it. They are looking around their environment, looking for color identification, remembering a sequence (rainbow order), and at the end the leprechaun left us a surprise (it was pistachio pudding, add water and this magical white powder turns green before your eyes! How magical..we did not eat it we just watched it change and then I tossed it).

Pots of Rainbows! I used those same foam popsicle sticks and students had to count out 6 sticks, one of each color, then remember the order and what ROY G. BIV stands for. They had a lot of fun!


IEP Work Time and Work Bags

It has been a long time! I am going to do a few posts because I have been taking pictures since January but have not posted them. I am going to start off with some updates on how I do my IEP work time this year.

Each morning, I set aside individual time to work on IEP objectives. Usually in the morning we have various therapy pull-outs, so it works out nicely that some students are in therapy while a couple are in the classroom as well. Since writing my IEP's, I made sure that I could write a really good data sheet for the objective before I wrote the objective. This did simplify the writing of objectives! I made sure I based them off the extended common core standards, the ones that I thought were most essential for each individual.

Once I had all my students IEP's written and data sheets made, I tried to set up a schedule to make sure that each week, I am taking data on every academic and behavioral objective on every student's IEP. This was not such a small task. A bit easier because I have 4 students, but still difficult because of pull-outs and also I have a student who does inclusion for 1/2 day. So, on Mondays I focus on reading objectives, on Tuesdays I focus on Math, on Wednesdays I do a "make-up" day for anything missed and/or DIBELS, on Thursdays I do behavioral goals and try to get my one student that does inclusion on all his goals, and Friday I do DIBELS and anything I didn't get to throughout the week and we also do our handwriting goals on Friday first thing in the morning.

I am working with the student on different tasks that I can take data on the IEP objective on so the big question...what are the other students doing??? This is always a challenging task as every special educator knows you have to be flexible. Students are going to be absent. Therapy pull-outs won't always be regular (they have so much to do and I truly think my therapists are amazing).

So, first, with the students I try (and I am still not there yet) to set up boundaries at the beginning of the year and keep them consistent throughout the year. If you are working or earning on the carpet or at the table, you stay with that activity until you are told to transition or unless you clean up, raise your hand, and ask for something different. So, some students are able to participate in an individual task in one of these areas while I take data on another student. My instructional assistant is awesome and we have one student on a routine with her because he responds well to that, where she works on the same thing every morning with him while I take data on another student, then we switch.

The SMARTboard has been a great resource in my room because students can work on that independently (simple cause and effect reward games, starfall, etc). And finally, work bags.

I have created these bags and they do wonders when trying to occupy a student (my instructional assistant can do them easily), they work when you have a substitute teacher in the room, they work with simple tasks if you have a student observer/teacher that wants to try a task with a student. They focus on academic as well as fine motor skills. It helps the students make choices of what they want to work on. They are simple, easily contained and hands-on. These work wonders while I am taking data on a student and need the other students to be engaged.

Here are some pictures!

This is pretty self explanatory but...cookie sheets are $1.00 at the Dollar Tree, and perfect size for these double gallon (I think) Hefty bags (purchased at Target).

Here are a couple of them sitting out, as you can see, cookie sheet fits in great.

This was the most time consuming one. I printed these off a website in color, laminated every letter, attached a magnet to every pom-pom in every color, and in this work bin there is also a cookie sheet so the poms stick when the child is working.

This one is a hit...little bath mats with mini suction cups hold the marbles perfectly. I colored in the dots black so they can see it better. We also work on counting the marbles as we put them on or take them off. Sometimes you get marbles all over the floor so be careful walking into Room 5 ;-)

This was a fun one, shapes, using foam colored popsicle sticks and velcro with foam cut outs in the middle.

These are just some examples, I also have a lacing one with lacing cards and beads, one with unifix cube pattern cards I printed out and unifix cubes, and one with clothespins and paper plates that you put the clothespin with the corresponding cue on the paper plate such as colors and numbers. I plan on creating a few more, vocab and picture match, a pringles can that I cut little holes in and your put pipe cleaners into the holes, and a sorting one. A lot of ideas you can find under "toddler bags" or "busy bags" on Pinterest. 

Tuesday, February 5, 2013

Essential Questions and 100 days!

Hello! It is early February and I am back from Orlando from the ATIA conference! It was such a great experience and I had the opportunity to learn so much about the PODD (Pragmatic Organization Dynamic Display) for children with significant communication challenges. All I can say is...WOW! A whole different way of thinking and definitely worth the research. I am practicing with a borrowed PODD in my classroom and we are going to see how we can effectively implement this for language in the classroom. If anyone is interested in learning more or discussing the PODD, please email me :-) I would love to chat!

I thought I would have a quick post because recently my school has been working on the common core (in my case the extended common core) and our PLC's or TBT (so many acronyms now... PLC is Professional Learning Community and TBT is Team Based Teaching) and we were asked to post "essential questions" in our classroom so any outsider would easily be able to see what the students are working on in the classroom. It is also helpful for the students, if they understand, to see what they will be able to do at the end of a lesson/unit/year etc.

My students all have IEP's so it was more difficult for me to write the essential questions because each student is so different! So, I took the extended common core standards for each IEP objective (we already wrote our IEP's based on extended standards so this made it a little easier to do this step) and made it into a simple question. I have an entire document that is of course, cute as well as informative, but I thought I would post the meat of the information here in case you are struggling to incorporate the extended common core in the classroom like I have been this year. If you would like a copy of this document, you can email me and I can send it in pages format or a word document.


Here it is! I hope this helps some teachers!


Reading
RI-L.K2.1c How do I answer “who” questions?
RI-L.K2.3c Who are the characters or people in a story?
RI-L.K2.1c How do I answer “what” questions?
RI-L.K2.2c What are the events of a story?
RI-L.K2.7c How do I show you a picture or object that relate to a story?
RL.K2.6c What does the author do?
RL.K2.6c What does the illustrator do?
RI.K2.4c How do I match a word to a picture?
RI.K2.5c Where is the front and back of a book? Where is the title?
FOUNDATIONAL SKILLS!
RF.K2.1c How do I listen to a story?
RF.PC.K.d What are letters?
RF.K2.2c What are the sounds of letters?

Writing
W.K2.1c What is something I prefer or like?
W.K2.3c What is something I did?
W.K2.6c How do I use the keyboard or computer?

Speaking and listening
SL.K2.1c How do I listen to others and respond?
SL.K2.3c How can I ask for help?
SL.K2.4c and L.K2.3c How can I tell you about familiar things in my life?
L.K2.1b How do I tell you what I see? (describing and 2+ word combos)
L.K2.4b Can I sort into categories?
L.K2.5c Can I say words I know?

Math
CC.K2.1c Can I count to 10 using objects?
How can I make sets of a #1-5?
CC.K2.5c Can I count 5 objects?
NBT.K2.2c Can I count by 10’s to 50?
NBT.K2.2b Can I count by 10’s to 100?
MD.K2.2c Can I tell you which object is longer than the other?
MD.K2.4c Can I measure something?
MD.K2.7c Can I show you what happens in the morning and at night?
MD.K2.8c Can I match coins?
MD.K2.8c Can I identify a penny?
MD.K2.11c How do I make categories?
G.K2.1c What are squares, rectangles, circles and triangles?
G.K2.3b How do I put something above, below, beside, or next to something else?

Science
ESS.K2.1c What happens in daytime and what happens in the nighttime?
ESS.K2.2c How do I tell you different short-term weather conditions?
LS.K2.2c What are parts of a plant and animal?
PS.K2.1c How do I use things for their purpose?
PS.K2.4c-5c How can I move something that is stopped, or stop something that is moving?


Social Studies
HIS.K2.1c How can I tell you what is on a schedule?
HIS.K2.4c How can I tell you something I like to do?
GEO.K2.1c How can I show you where objects go with words like “over, under, behind, next to and down”?
GEO.K2.3c/ECON.K2.6c What is happening in the community?
GVT.K2.2c How do I participate in a group activity?
GVT.K2.3c How do I show you the class rules?
ECON.K2.1c Can I show you which one is bigger/smaller, or more/less?
ECON.K2.2c How do I tell you what I want?
ECON.K2.3b How do I make a choice?
ECON.K2.5c Can I show you money?

Also, we celebrated 100 days in Room 5-we made a chain with colored paper in which each group of 10 was a different color. The students really were engaged with this and it worked on their fine motor as well. We also worked on identifying "who" gets a turn next, etc. The kids loved watching the chain get bigger, and bigger, and bigger....
I also made these 100 mats and you can see two versions below, one differentiated to include 10 dots on each group of 10. They counted out 100 objects in groups of ten, practiced counting to 100 by 10's (singing the song). I had all the students use Froot Loops that we then laced into necklaces after (actually I had to lace them because it was a bit too difficult) but I had one student who did not understand the concept of counting out food and not eating it! (I don't blame him!) So, I had him using cubes and stacking them into groups of 10 which worked out great. Sorting, color identification, counting to 10 using objects, counting by 10's ... plenty of standards in this lesson! And, it was fun!
We also decorated glasses that said 100 on them and did a 100 step writing prompt to predict where we would end up if we walked 100 steps. Let me know if you would like a copy of this writing prompt which includes pictures for students to choose from :-)