Thursday, March 31, 2016

Winter Centers

Spring is here! Over the winter, I took some pictures of my winter centers so I wouldn't forget and thought I would share them! I have a modified reading center and then my two switch activation centers.

Here is the green table with two switch activation stations for students. You can see them closer below

I get creative with the switch stations using decorations from home and a powerselect to turn them into switch toys, or you could use battery interrupters if you have a toy with battery that will always stay on.
On the left, I created the color changing light board with behind the TV lights from IKEA. They automatically fade, change or you can pre-select a color. In the middle I have a winter sensory bag with blue liquid and white snowflakes. I added garland and a bubble switch toy to make it seem like a wintery scene.
On the right, I have used a magnetic ice skating scene toy that I found at a garage sale. When they hit the switch different songs play and the people skate around. Also, there are star lights I also attached to light up.

My co-teacher also has a switch center and she decorates mini trees that will light up and play music.

Here is another set up with the IKEA light board and big bows. There is also music and a fan with this two switch set up.
Here is my co-teachers fabulous light board, colored lights with colored saran wrap make a sparkly visual scene. You can see there is also music peeking out behind the board.

Here is another set up I did using a mini light box, fake snow, snowflakes, snowmen and dangly shiny ornaments. 

Here is my more academic reading center for my instructional assistants when I am not at the reading table. I go M, W and F and they work there T and R and do the same schedule each time. It is easy to prep and the kids and IA know what to expect. First, they sign in, card deck, interactive journal, trace it.write it.say it, weekly workbook and daily 5 choice.


The sign in sheets are made precisely for their names, first they stamp, then they trace, then they write. They are doing so well they don't stamp and just write in each of the boxes.

The card deck is the same as my OG card deck but they get to color their own on card stock, go through it, then at the end of the year take it home! A way for them to still be doing OG procedure even though I am not there.

The interactive journals are a combination of things I found on TPT but one of them is rainbow writing the new letter so I have organized the center so everything is right there!

For the trace it, write it, say it we have multiple formats for them to practice a new letter. We have printed some OG cards and added hot glue over it to give it a multi sensory approach, we have the large OG tracing page, we have a play doh page that also has the uppercase, then dry erase, chalk and gel pad to write it. 

The weekly workbook is a combination of my favorite worksheets-Handwriting without tears, OG, etc. that I make each week and the Daily 5 choice is another chart listed with directions on how to complete whichever task they pick.

Hope you enjoyed some winter centers! 


Sunday, November 29, 2015

Thanksgiving Feast!

In kindergarten, we have a fun inclusion activity on Fridays where all three classrooms (two special ed and one general ed) get together for an activity that everyone can be involved in. This time, we decided to do a multi-sensory Thanksgiving feast! We were practicing table setting, manners for the big day, writing our names, using glue appropriately, following multi-step directions and tracing (we need some fine motor work still this year).
We started by picking our color of place mat and setting it with our fake silverware.


\ 
Then, we had all our fake food in big portion containers. Here's the mashed potatoes and butter. We practiced starting at one end of the table and taking only one portion and passing it down. The kids had fun!

This is what the feast looked like. We made turkey legs from brown paper bags, mashed potatoes from cotton balls and yellow paper squares, dried peas and dried corn. After everyone was served, they pretended to eat and they practiced turning and talking to a partner to share what they were thankful for.


Friday, July 10, 2015

Seasonal Bulletin Board Solution

I love borders. They are so cute, especially the vintage, loud, primary color, in-your-face elementary borders. I collect them, take them when teachers offer them to me and promise myself that next year-I will make a seasonal bulletin board. Problem? I don't do bulletin boards. I envy the teacher who has time to take down a bulletin board and make it super cute for the season. I just can't! I don't have time when I am (fill in the blank, I know you understand).

So, how will I use my borders and change them out seasonally for all to see? Here is my solution! Make super cute posters over the summer, or whenever you have time, laminate, and then put them up outside when displaying the student's seasonal work (I use clipboards to change student's work easily-see older post)

I already have two at school (one double sided) that say: Pumpkin report and We are thankful for...because these are activities we do each year.


So anyway, you can make them double sided, use your borders, hang them in the hallway easily, change them quickly and display student work nearby. One is covered because it has the school and mascot. By the way, Lakeshore is having a sale right now and these poster boards (high quality, thick, colors) were only like 63 cents! That is also where I got the "winter celebrations" package-20% off 4.80! 

On a side note, I found these cable ties at Ace hardware (about 3.50 a piece-kind of expensive) that are 6 inches. They are a great alternative for binder rings, especially if you use a PODD like me. They don't come apart and don't get caught as easily in the middle. Great alternative! Worth the investment!

Sunday, January 4, 2015

Working with Students who use Switches

This post is going to follow the last post on center time, but this one is focusing on students who are working with using switches for cause/effect and communication. 

Over winter break, I created a poster to help the adults in the room (and substitutes!) know how to work with these children. Our IAs do such a fabulous job working with these children, but it helps to have reminders or ideas on where to go and I am all about that data and accountability. I want to know what each child did with each adult during each center time and how they reacted specifically. It is important for me to know if they are always sleeping during centers even if that is what they are doing but to see what types of activities they were doing. All data has a purpose.

Here is the poster. I will include all the text on this post!
On the top left, here is the text:
Key notes for working with students using switch activation:

1. Does this child have a switch placement established, meaning, do we know consistently where they use their switches all the time?

Yes: Plug them into interesting toys using their select switch, or using both their scan and select switches. If using two switches, put the item on the same side as the switch (if the switch is on the right side of the head, have the item also on the right side, same for the left). Use activities of their interest and strengths, for example, if the student cannot hear, do not plug them into something that is audio only. If the student has low vision, try to make the area as dark as possible and use lights to stimulate. Try to communicate with them to find out their preferences and note on their data sheet (use PODD, “that’s the one I want” or yes/no switches).

No: Try different switches and different placement and you may use a switch preference sheet to note your findings. Use one sheet per switch. You are looking for the most easily accessible movement. While you are trying to find switch placement, you can activate to test different toys to find their preferences. Once you know they like something, you can hook it up to a switch and they will be more motivated to activate the switch. 

2. When they are hooked up-GIVE THEM TIME TO DO IT THEMSELVES! This is critical. If you are pushing the button for them, they are not learning the motor movement or that they are in charge of their own learning. It may take an awkward amount of time where you feel as if you are doing nothing. You can stimulate the area by the switch so they know where it is and talk them through it (touching their head if the switch is activated by their head). If they are capable of activating it, they must be doing it on their own. Every time you hit the switch for them, they are loosing valuable learning experiences. You may show them how to do it 1-2 times at first by using their body part to show them, hand over hand.

3. Ok-I know how to hook them up, I know what they like, and we’ve been doing this a while. What do I do next?
Communicate and choice making. When they come to your center, ask them what they feel like doing today and use their switch for them to communicate (HINT: their switch must be hooked up to communicate with you “that’s the one I want” or yes/no). Let them pick a toy, then ask them if they want more, they have to communicate with you to get the activity, not just getting the activity anymore. Make it more academic-I have two books today and we are going to read one, which one do you want? Then ask them, what was our book about and have two choices for them to pick from (use PODD or you can even go to the sensory room and pick overlays for the light box that deal with the story (and one that does not) and ask them questions that way). Practice counting by using a counting switch where they can count along with a story or game. Try new things or simply-ask for advice from other adults in the room. Everyone has great ideas and new insights. PLEASE use things in the classroom-that is what they are there for!

Then, I go into the three types of set ups with pictures,
TACTILE:
These set ups are ideal for students who you are unsure how much vision or hearing the student has. These set ups provide the student with tactile feedback-anything that they can feel using their sense of touch. You can use these set ups on their hands or other parts of their body, be careful around the head or face (do not place near mouth or shunt). Use of vibration or other textures. Engage and note change in expression, vocalizations, eye movement, or any other response. Sensory matching cards are fun and also provide a visual experience. You can engage with the student by feeling one card, then another and determining if they are the same/yes or different/no. You can fill up a bin with different material for the student to engage with. This can be especially helpful for students who move their hands a lot or typically have their hands in their mouths. Please do not let them put the materials in their mouth. Clean all equipment.

How do I make it more academic?
Tactile letter cards, tactile number cards, tactile ABC book. Engage with the students and talk them through it, pair it with a song or a story, engage with their pointer finger, encourage them to feel and participate.
VISUAL:
These set up are ideal for students who have low vision and are working on attending and tracking. It can also be used for students with good vision who enjoy looking. Please attempt to make the area as dark as possible and use the black background. Engage with the materials near their eyes and in different places near their range of vision to find a place where they attend most often. This is optimal placement-take notes on their data sheets. Use shiny or colorful materials and pair with a light for a more visual experience. Give them time to attend. You can also time how long they attend, and also note changes in facial expression, movements or vocalizations. 

How do I make it more academic?
Tactile Treasures books-use these to pair with stories or songs, or to engage with the pointer finger and then allow them to look at them. Counting, shape identification. Use the doodle mat to draw and then have them look at it. Use high contrast backgrounds or the light box for them to attend to. Use different overlays and different placements and tell them what they are looking at and note preferences. Color preference is a big thing for students with visual impairment. Try to find the color they can see best. Do a preference assessment for each color and take data on attending. You can also do sorting activities or the transparent letters on the light box.

I also talk about the direct select-which you can see located above:
Direct Select: You can turn anything with a plug into a switch activity by plugging into the direct select. You can determine how much time it stays on when they hit the switch. Note: if you have two switches plugged in, only one can be activated, then once it stops, they can hit the other one-so they won’t get both stimuli if they hit both at once. This helps them to attend to what they picked first and understanding when it’s done, they have to hit the switch to enjoy again. Try new things here-the possibilities are endless!

AUDIO:
These set ups can be beneficial for students who have low vision but good hearing. Use the iPad to watch videos or songs, read them stories or use a listening center to listen to a story. Use musical instruments and present them not in their visual field to note how their hearing is-if they turn their head when you play the instrument, or if they vocalize, move or have a change in facial expression. Encourage them to activate the audio or musical instrument. 

How do I make it more academic?
They can make choices on what they what to hear or play. They can choose books. They can choose songs or videos to listen to. Do a preference assessment on what sounds they like best.

And I also talk about different switches to use:
SWITCHES:

Toggle switch: this is used like a joy stick but often if I hold it near a body part, it is an easy activation-such as holding it by their head and the turn of the head can activate the toys. 

Jelly Bean: these switches often have velcro that you can attach to a strap so that it can be placed hands free in different places on their wheelchair or near the area. This is helpful for head switches or to attach to trays.

Tactile switches/suction cup: these switches are good to stick to surfaces but sometimes need dycem to attach. Be creative in placement-under a tray they can activate with their knee, for example. This is good for students with a lot of movement, particularly their hands. You can sometimes put these upright on a tray or surface so they can reach directly out to activate. 

So, this poster should help everyone get some ideas as to what these kiddos are working with. But, like I said my goal is data to. Show what you did with each child each time. It is best to work 1:1, but there are 2-3 kiddos at each center. My goal is to get one kid set up with an independent task, or even that child observing you working with the other child, and then taking good data on one student. I would rather have one student get a lot done rather than trying to manage two kiddos and get nothing accomplished. 

There are many ways to work with each student. Each kid has a clipboard at their station. It has an individual IEP data sheet on it in a clear sleeve with a visa vis marker attached. They can take quick data on this (usually it is frequency or duration) and then I photo copy it on Friday, put it in their binders, and then clean it off for the next week. We also take data during circle (maybe another post!). 

If we do not know where the child uses the switches best and consistently, they can use a switch preference assessment. They attach one switch up to one toy and test all the accessible areas of the child's body to determine if they can access that particular switch and where is the best place for it. They can also look for other cues such as eye gaze, etc. We are looking for specific interactions with the stimuli and trying different stimuli to see what motivates them!

We also have preference assessments. This, they can try different activities and see what the child is preferring and how they are interacting with different activities. 

Many of our students get on the computer and play switch activated games. My co-teacher made a fabulous list of all the computer games and what types of switch they use (single switch, two switch scan/select, two switch play again each other, etc) and each child has a sheet. You highlight the games they seem to enjoy. There is also a data sheet where you write down the game and do frequency count of how often they activate the game on their own. We also have pictures of all the computer games to do a list for the child to communicate their choice. 

We need to get more going with the iPad. I got some switch hook ups and will get that going soon!

These are hanging on the wall so they can choose them and take notes and put on the child's clipboard. 

Here is my single preference assessment:

Single toy, instrument, color, or other item that you are testing their preference (please write date)
Notes (change in facial expression, visual attending, change in movement, vocalization, reaching, etc).
Example:
1/5/15-pink light toy
When first presented, the child had their eyes closed, but when activated, the child opened their eyes for 2 seconds before closing again. When activated again, the child did not open their eyes.
Example:
1/5/15-bird toy with sound
When first presented, child had eyes closed, but when activated, they opened their eyes and smiled. They kept eyes open for entire activity (4 minutes)


Here is my multiple preference assessment:

Multiple toys, colors, instruments or other items you are seeing preference (please add date) Item 1
Item 2
Notes or activation tallies
Example: 
1/5/15- on select switch (right) student is on light box with red overlay
On scan switch (left) student is with a switch toy dog
R- IIII
L-IIIIIIII
Time: 6 minutes, 50 seconds


Here is my computer game data sheet:
Date
Game and amount of time (be precise, set timer)
Activation Tally (single switch or select switch)
Activation Tally for second switch, if using two switches
Notes (change in facial expression, vocalization, attending)
Example: 1/5/15
5 Firefighters, 10 minutes
IIIIIIIIII
N/A
Smiled and laughed
Example: 1/5/15
Load the Truck, 7 minutes
III
II
Seemed to hit coincidentally, not looking or engaging, closing eyes.


I do not have samples of my switch placement assessment on my computer, but it is simply a picture of a child in a wheelchair with arrows at each possible switch placement. The adult writes the type of switch and stimulus tried and then attempts to have the child activate it at all body placements to see what they were able to independently, looking for the most accessible switch placement. 

I hope this helps! It can be a bit confusing. I will take some pictures of the new set-ups in action to ease any confusion!


Modified Reading Centers


Hello and Happy New Year! I am excited to get back to school and working with kiddos. Not many posts since the beginning of the year. I wanted to fill in readers about my modified reading centers. I teach reading while my co-teacher teaches math and we work with kindergarten students. This summer, I was fortunate enough to get Orton Gillingham training and I am also working on my reading endorsement and am done after my last class this spring! I wanted to use these strategies with my students, however, they are functioning at a much lower level than a typically developing student. So, what to do but modify! Please see earlier posts about how we set up our centers, but I will describe what the "orange" center works on during our reading center time, 30 minutes a day. They are either working with my co-teacher and I or any of our four instructional assistants. This set-up works well for when they are substitutes also.

One of the Orton Gillingham strategies I have adapted is the ABC folder, which is similar to the "card deck" if anyone is familiar with OG. It has the letter and a keyword picture below it and I paste the keyword picture into their folder for the letter we are studying each week. So, each student has a folder with the keyword pictures under the letter that we have reviewed in class. They work on this at the beginning of each center as a warm up. Some kids practice the routine-saying a, apple /a/ and pointing to the picture, and other students point to the letter or sound or picture the adult asks, some practice singing the abcs and following along, etc. It can be a "Game" warm up-find this letter, find this sound, find this picture, etc. like bingo.

I made a picture schedule and laminated it so the kids could check off each activity as they do it. It also helps the adults know what I am talking about with a picture of the object.

The second activity on Monday is the book box. We got a Donor's Choose grant for 6 listening centers so I have a bunch of books on CD which is a huge hit this year. I have audio jacks and two sets of head phones so the adult can follow along with the student and keep them on the correct page. This also works on book handling skills and pre-reading skills. They are into exploring books this year.

As you can see, Monday is all about book exploration and comprehension. We use the PODD, which I am not sure I talked about in another post, but it is a great communication tool in the classroom.

Here is Tuesday, you can see the ABC folder is a constant each day.  This idea was all about making vocabulary a tactile experience. I have a list of vocabulary words for the week paired with a picture and they try to find those things in the sensory bin. Usually it is themed or related to a book. Then, I throw in all the tactile letters for the letter of the week and they search for the letter.
I created a letter dice by velcro-ing letters to the sides of a large dice. They think it is such a fun game to roll the dice and see what letter they get-aiming for the letter of the week. We use the misses as learning opportunities. Did you get the letter of the week? no? What letter did you get? what sound does it make!?
I have an ABC big book that my co-teacher made. It has each letter of the alphabet on a big page written in upper and lowercase and in different fonts mixed in with some of the other letters of the alphabet. They have to be detectives and find the letter of the week.
Finally, there is ABC bingo which can be differentiated for each student.

Wednesday is all about writing and pre-writing skills. They build the letter using handwriting without tears pieces, they make the letter on play doh mats and they write it on dry erase or chalk boards. I find the kids that avoid writing like to use the water on the chalkboard to "erase" your writing. I also have a prewriting worksheet for them to complete. This particular group does not do much worksheets because they are very into pre-writing and aren't developmentally at the worksheet level.

Thursday is all about sorting. I have tubs where they will sort the objects based on the first sound they hear, then they will sort the letters based on what they look like. I pick the letter of the week and the past weeks letter and put a bunch of magnetic letters in a tub and they sort them into trays accordingly. There is also a letter box that I made over the summer with a bunch of objects to talk about with books that begin with that letter. Then, I have a worksheet where they sort pictures between this weeks letter and the week prior and they color the pictures. More working on handling a writing utensil.

Friday is kind of an overall alphabet day. They listen to songs we do during circle, each child has a name folder where they velcro match the letters of their name. There is a worksheet where they glue a letter on top of its matching letter and then they can play computer or puzzles that are alphabet themed.
The orange table is who completes these activities each week. I have a similar one that is even more academic for the red table, but along very similar lines, more worksheets.
Then, we have the yellow, green and blue table which are students working on more functional skills during center time-on the next post!

Tuesday, August 19, 2014

Back into a new school year!

Welcome to the 2014-2015 school year! I can't wait to get started with a new group of kindergarteners! If you look back to my post around this time last year, I discussed our classroom set up with my co-teacher in Room 6. We are keeping some things the same but also adjusting a bit too. Here is my door. I am not too into making cute things that have to affect on student learning, but I did make this cute door hanger that has no affect but being welcoming. It was all on clearance at Michaels and I did some hot gluing, stickering, laminating and tied it all up to be a cute little door hanger. Still have my cookie sheet for "Where am I" which works well when we have kids all over and pulled by many adults.

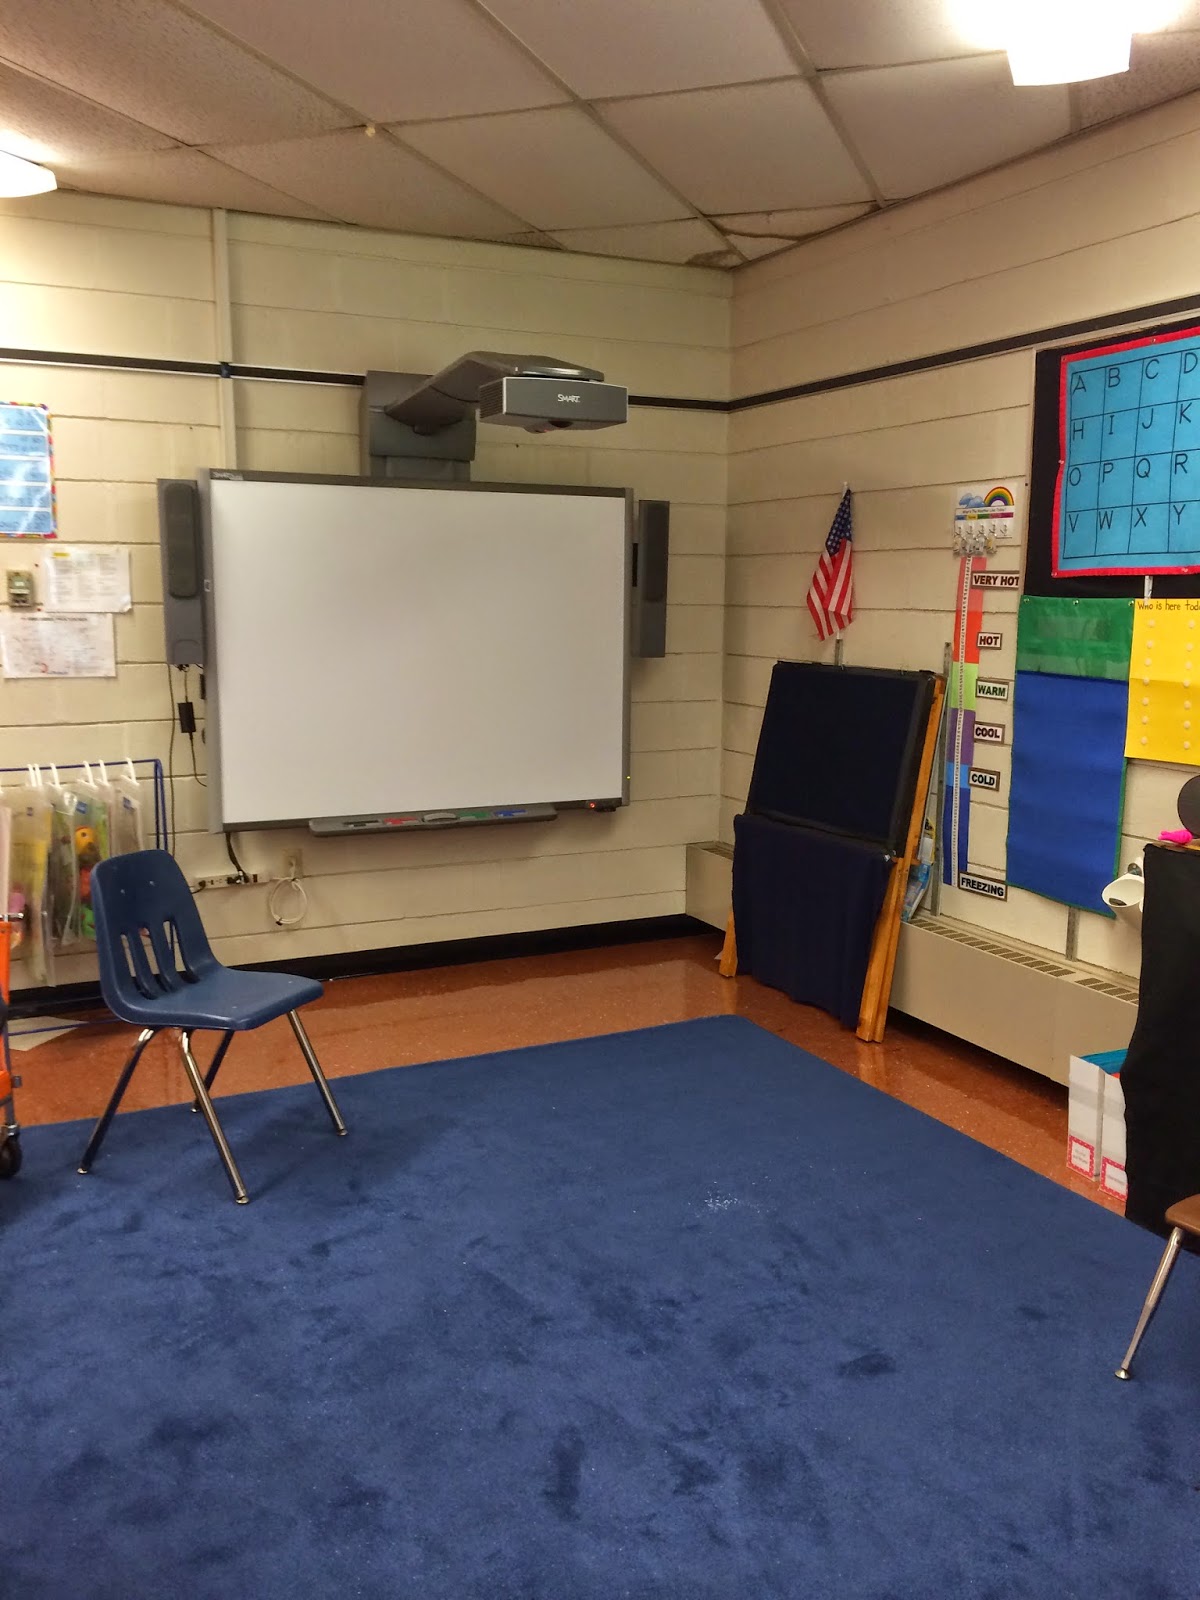
When you walk into my room, I now have a GIANT non-distracting carpet! I love those cute carpets with colors, letters, numbers and "spots", but it is too distracting for some students that have visual needs, etc. Plus, it is bigger so wheelchairs don't have to struggle to get over many edges.

My goal was to open up my space, I removed a built-in shelf unit and opened up the smartboard and circle area to accommodate more students. I will get into my circle time procedure and boards a bit later, but as you can see I have two boards for circle time and a covered bookshelf in between. I covered all my bookshelves so there is less distraction.

On the edge of the circle I have some storage (all matching, of course). I have circle time supplies and trays (cookie trays come in handy all the time) and above that, storage for big books and flip charts. I have a drying rack (see post) and story prop filing cabinet filled with manipulatives.

We are still having our center rotation! Red, orange, yellow, green and blue areas are all around our two rooms. We spend time there twice a day, once in the AM and once in the PM. We spend time working on IEP goals (reading in the AM and math in the PM). All the staff works at the stations, so Instructional assistants lead small groups. It works well because we get to work with all our students on a smaller scale and take data on IEP goals and objectives. Also, students get to generalize skills by working with many adults and adults get to stay on the same page and work together to accomplish goals. This is the red table. Notice it is actually red, how awesome. This was a new table for this year. This is our more "academic" center, located by all the circle time materials.
Last year, we had the students rotating daily (they would go to all centers by the end of the week) and IA's rotating weekly and teachers staying at the same center. We decided this year we are going to assign kids to centers and for the most part, keep them there all year. We can keep their equipment and notebooks there and it will be a little bit easier to remember. We can really individualize this way. We will have adults rotating weekly, so we can spend more time really working on skills with one group of kids. In the beginning of the year, we will rotate daily so we can get some baseline on the kiddos and get to know them better. IA's and teachers will both rotate this year. At each station we have IEP bins with personalized materials, AM and PM center drawers which include materials we have prepared for the stations and IEP notebooks with data sheets. We also have each colored table notebook for people to write notes on what they observe and questions to ask, as well as a colored binder that houses basic information and a checklist of activities that need to be completed for each student. Want to know more? Contact me directly and I would love to give you samples!

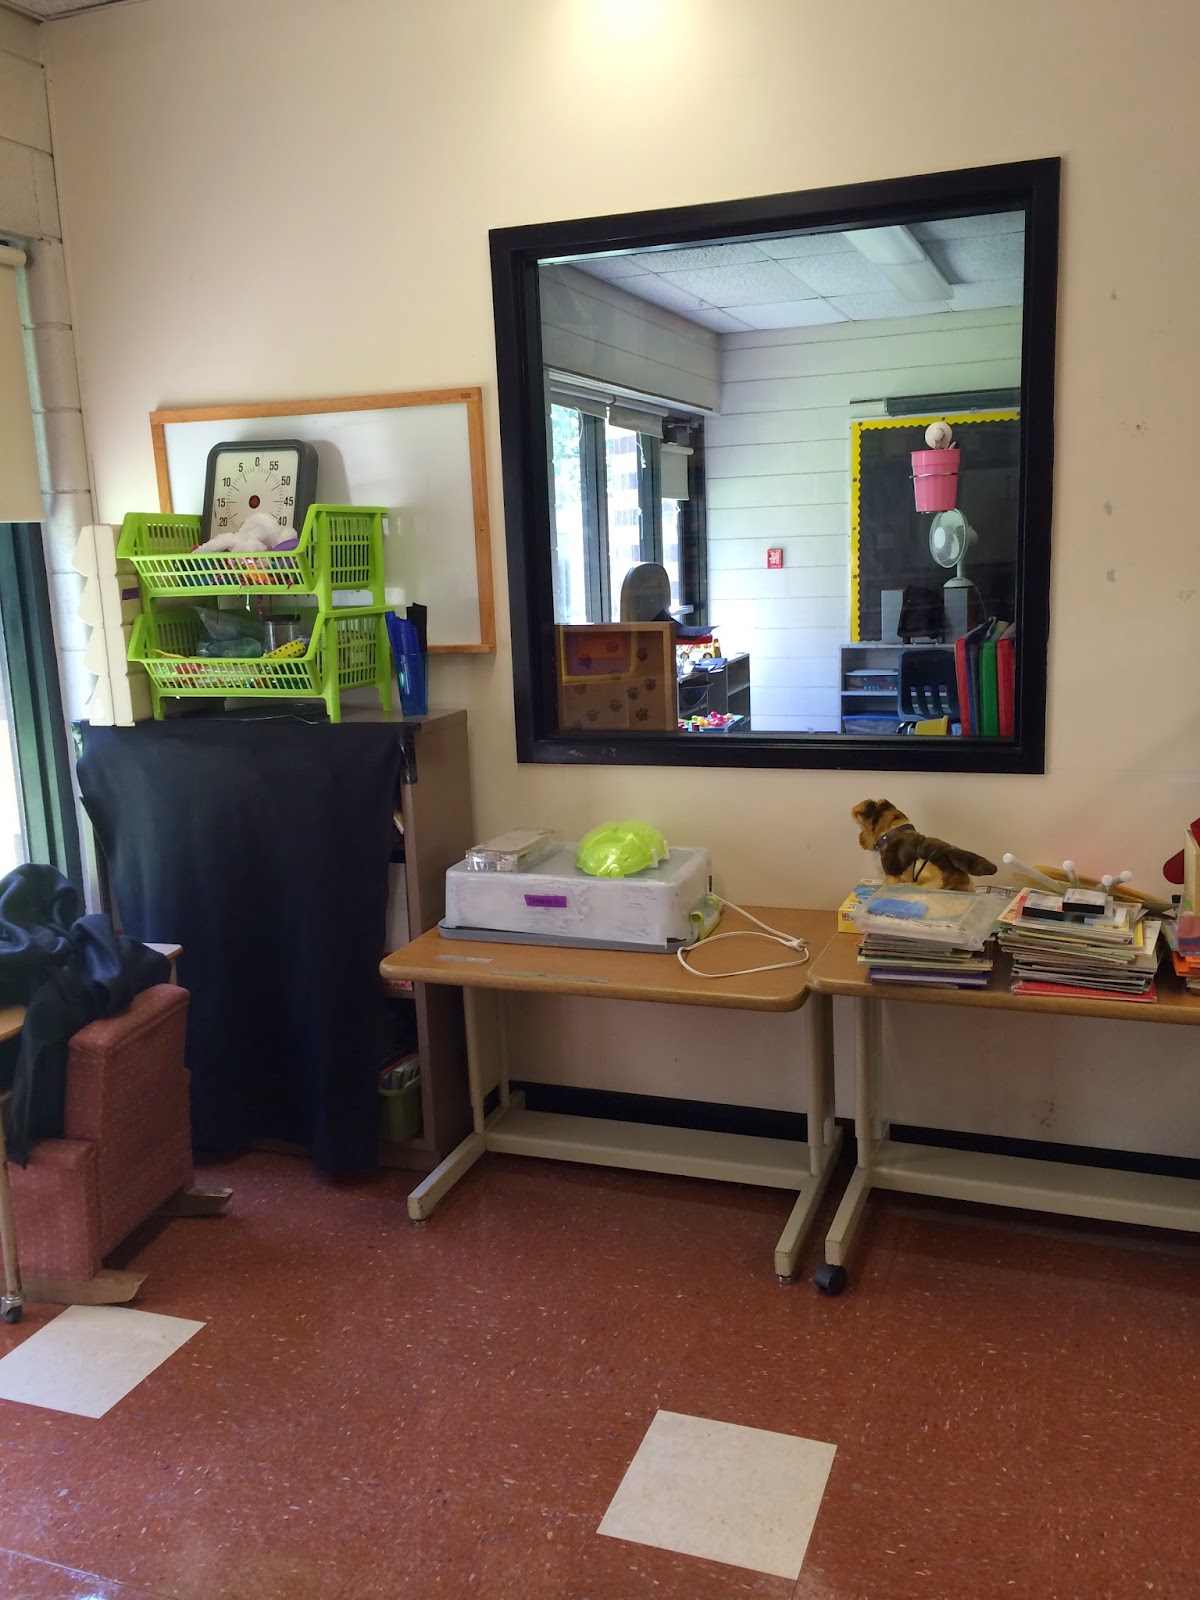
Here is the green area, which is vision and sensory. This used to house my large table, which I got rid of for the sake of space this year. These two tables can go up and down, adjusting for the child's wheelchair or chair they are sitting in. On the table is my homemade lightbox (see post) and a couple of awesome lights I got from IKEA! One of them is meant to mount behind a TV and changes colors! In the green bins are many sensory materials and vision materials. Underneath is my bookshelf with all my books to pull from. 


Here is the orange area. Similar to last year and also has a trapezoid table. These tables are small and easy to move so I stuck with two of these this year. The touch screen computer is at this center along with that white shelf which will house individual student materials. 
The yellow and blue are in my co-teacher's room. The yellow area is similar to the green area, but my co-teacher has a lot more materials than me. Her vision areas are awesome!! And blue is similar to orange, access to computers, etc.

Here is a quick shot of my desk. I tried to continue to make room and push it back more this year, you can see two printers on one small, two drawer filing cabinet! I organized my filing cabinets again, the black one is a craft cabinet with all craft materials and the pink one houses all my teacher resources and additional materials. The two drawer black filing cabinet is for my instructional assistants. On the desk (individual desks come in handy-easy to move and great to use with kiddos one-on-one!-small space tip!) there is a bin for breakfast supplies and (not pictured) a bin for attendance and notebooks sent home.

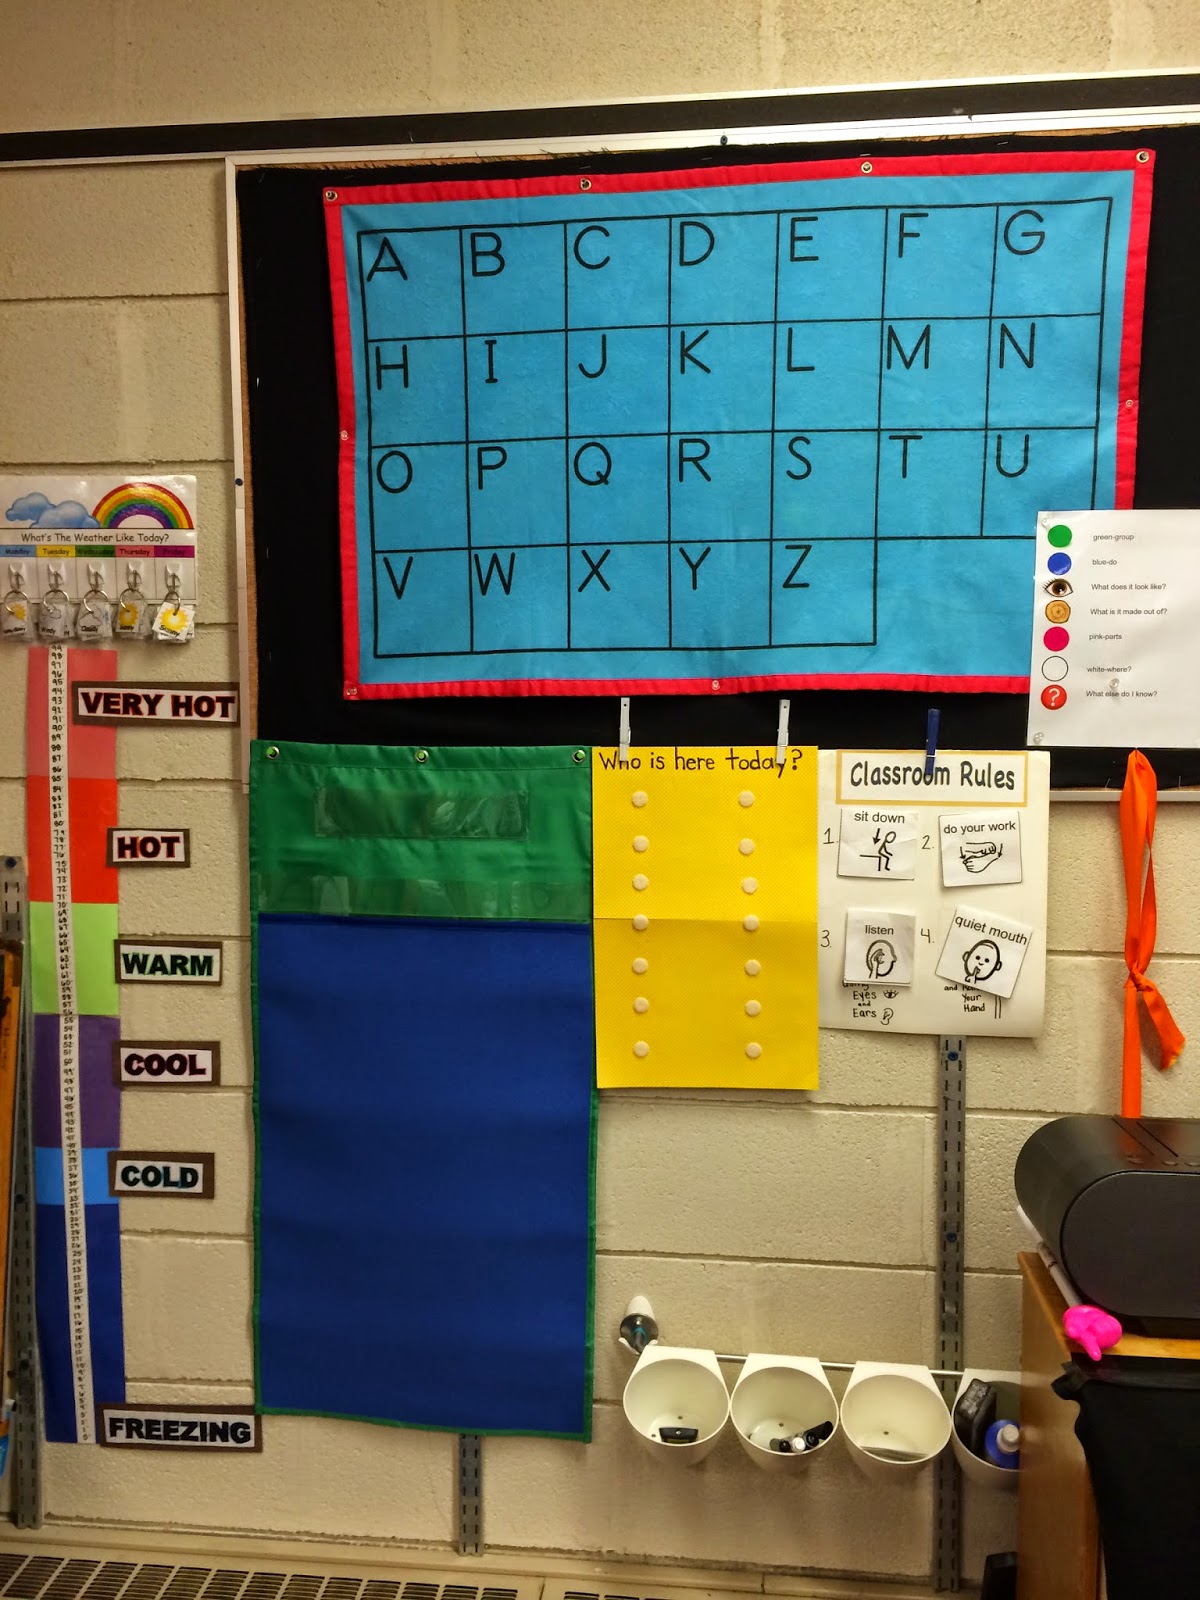
So here is a close up of part of my circle! Notice my nice little IKEA container for pens, etc. I have a chart with the letters that is felt. I will be using Orton Gillingham (that I was trained on this summer!) with a combination of visual phonics (that I was trained on this summer!) during reading circle (my co-teacher does the math circles). I have cards that will go up as we learn each letter. I also have the classroom rules, a little EET (expanding expression tools) area, a who is here today?, a question of the day chart (from Lakeshore learning) and a weather area here. Also, remember that the easel (felt and dry erase) is there for story and sentence times. 
I work with students that have many cognitive needs and communication needs. As a teacher, I find a balance between all of the things the student needs (and continue to work on this balance each year!)-academic, social, communication, functional, sensory, etc. But, in particular, communication is very important to me. I tried to choose activities that would be very communication based, letting students express themselves, more on "more" and "all done", choice making, "yes" and "no" and activating communication devices. We use many voice output devices and also the PODD and talking brix communication devices. I have many ideas for my circle you may see in a future post, or as always, contact me!


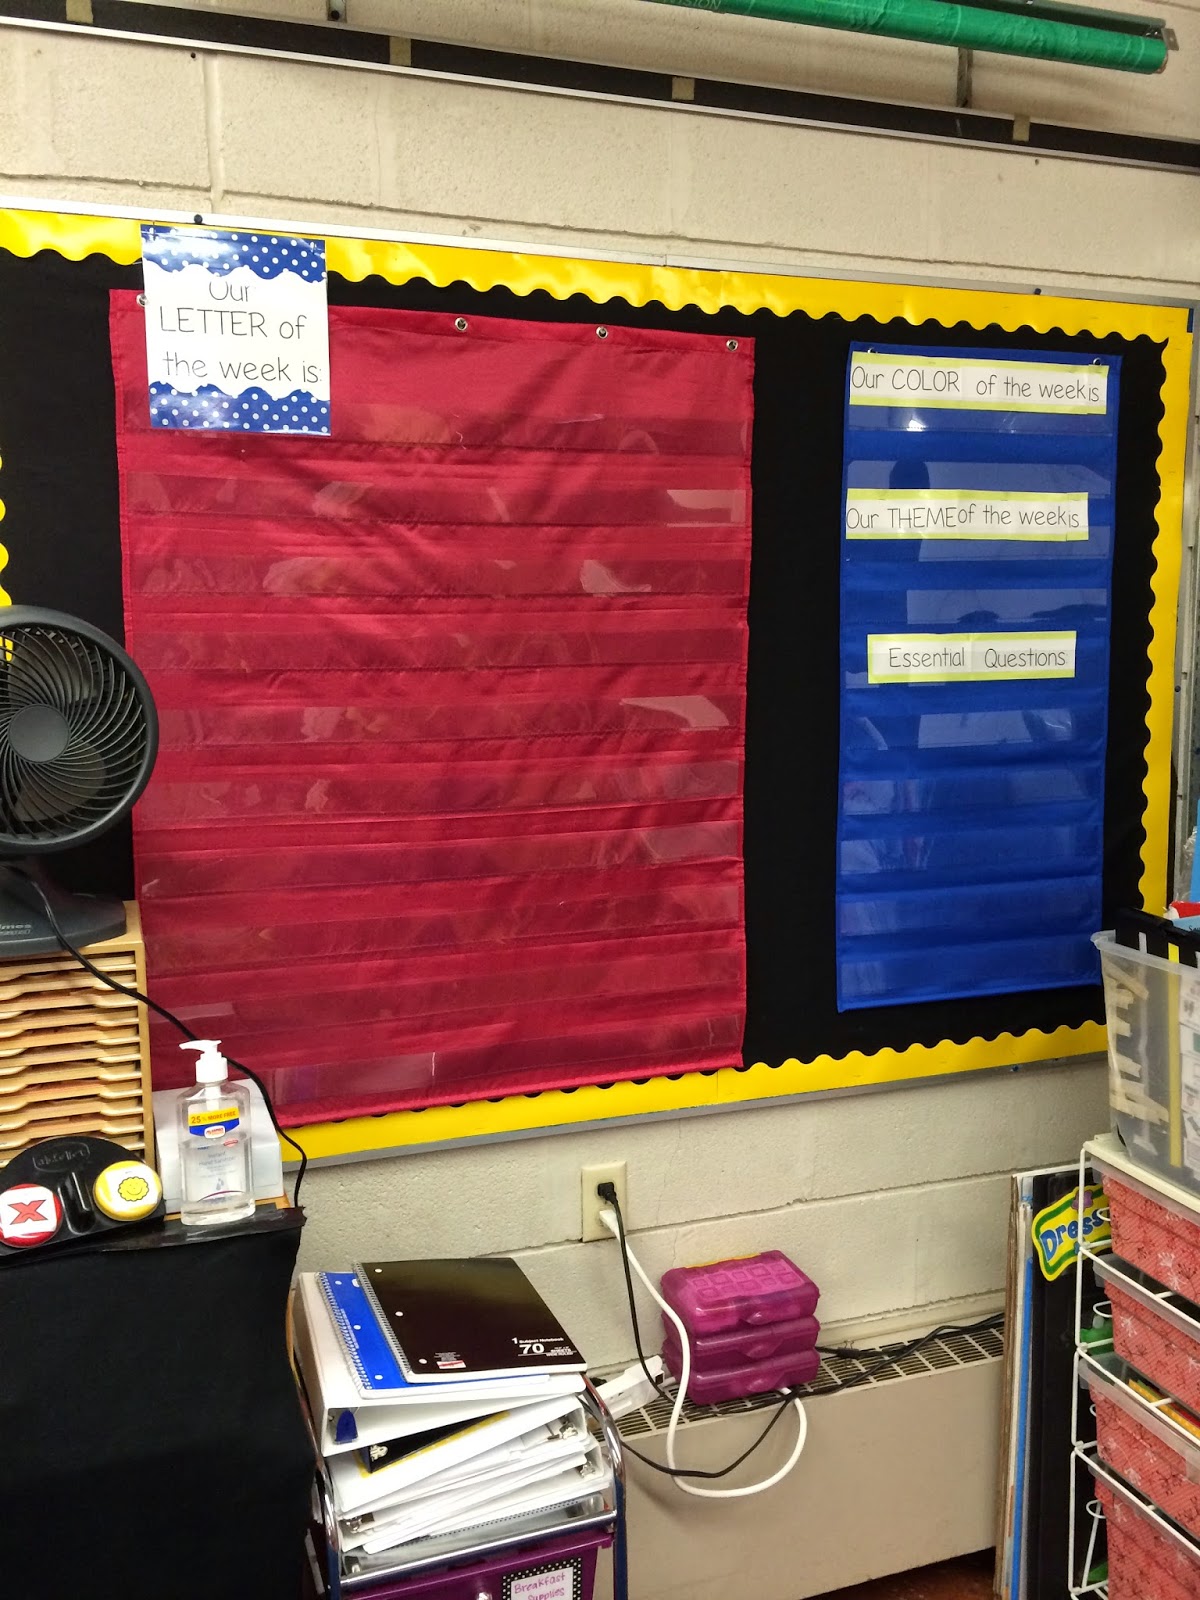
Here is the other board from my circle time where I will go more in depth with the letter we are working on. I will put up cards with pictures and words of things that begin with the letter we are focusing on as our "word wall". The other, smaller, pocket chart is going to house our weekly themes and essential questions. I went through each activity we will be doing in circle daily and for each individual day, matched it with the appropriate IEP goals/objectives, matched it with the appropriate Common Core Extended Standard, and then wrote an essential question that is appropriate for our students. I have attached a sample of this, that is what is in the blue pocket chart.

Here are my cubbies :-)


Here is my shelving and storage area. We have a sensory table! And, the two bookshelves that are covered have toys and puzzles.

Here are my new letter tubs that I made at the end of last year. So, when we are studying a letter, I don't have to go and gather all the things I need for all the activities we do, they are all included in my letter tubs. 

Here is a sample. They have big letter flashcards, a tactile foam letter, manipulatives, our letter tubs (small objects), books that contain simple pictures of items, activities written down so I don't forget, cheaptalk displays and more.

On my desk I wanted to make my own version of those filing cabinets I see on pinterest. I have a copy/laminate section (on top so IA's have access easily to it also), file/give (I am always having piles on my desk of things to give other teachers, therapists, etc and now I can find where I was storing it!) and a "now" section. I have many things I am using "now" but don't necessarily need to carry around with me in my teacher binder (oh! my teacher binder I made this year! That must be another post!)

These are just pretty so I have to share, from Target. I have one for each student that I keep all their important documents to reach at a moments notice.

Here is my desk. I got creative with space again and have a filing area under my desk too.

This is on wheels so it can move back and forth when I am going from opening filing cabinet to the opposite filing cabinet. Important abc work that I copy often, computer paper, etc.


Here is my birthday wall right by my desk. I fill out the birthday certificates at the beginning of the year and put them in order so I never miss a birthday and know when the next one is coming. I am going to use my birthday garden again this year (see post). I also updated my data clipboard because it used to say green table when I was always at the green table last year, but now we are moving around so it just says my name.
I got some awesome mega-suctions from IKEA that are meant for the bathroom but work so well when trying to save in space on my classroom. I don't know if you can tell but in the green area, attached to the window, is a suction cup that houses all the materials my IA's need for projects in the AM so they don't have to try and come into my small desk area and poke around for scissors, stapler, etc. And, it is all out of student reach to be safe!
Hopefully I can do a teacher binder post, but still just trying to make my goal of one post per month this school year. It really actually helps me remember what I did so I can plan for the next year!