Wednesday, July 2, 2014

2013-2014 in a nutshell

So, I am not telling any teachers out there any new news by saying this year was extremely hectic. In Ohio, I am talking OTES, SLOs, RESA, etc. There was no time for anything. I also had a student teacher for the first half of the school year. Luckily, although I wasn't posting, I did take pictures of some things I did during this past school year! My goal is to post one time per month next school year. I'm back in the blog game!

First, is an example of when I was doing word of the week. Our word this week was "yes". It is the way that I modify the use of sight word vocabulary in the special education classroom.

 This is how I modified it for my higher students. They got to work at the back table with an instructional assistant during the lesson (after introduction). They were able to choose three things they can do and then write a sentence about their favorite thing they can do.
One student is just putting the sentence in order and matching the word practicing one-to-one correspondence. Some students are tracing (the colors are based on vision). 


Here is my tray with both sides, since "more" and "all done" are very similar to "yes" and "no" we work on both ways of expressing ourselves and try to get them using "yes" and "no" and shaking their heads since it is such an appropriate form of communication that all people would understand. Actually, our favorite way of using "yes" and "no" is by using Talking Brix communication devices because they are light weight and can be held under their chin for yes and near their temple for no and we teach them to shake their heads.


 Here is a repetitive text that I created to use during the lesson. Many of the pictures we use in the classroom daily in our rules and other things so the students are familiar with them. I also used a voice output device for students to share read with me.
 Here are my heads that I shake from side to side and up and down to practice saying yes and no. I sing a song "We shake our heads side to side to say no, we shake our heads side to side to say no, we shake our heads side to side if we want to say no, we shake our heads side to side to say no" To the tune of "if you're happy and you know it" and the same with yes but instead of side to say I say up and down. I try not to make my no face unhappy because "no" is not always a negative and often we teach children to smile for yes and be sad for no but that's not socially appropriate. (for example, if we teach them to smile for yes, and then ask them if their dog passed away and they have to smile to say yes, it is not socially appropriate). You can be happy saying no to things you do not want.
I have a large sentence strip I use with the rest of the students to practice making sentences. We do this in different ways, they can make choices between 2-3 options and they practice putting the sentence in order by making choices (should we start with yes or I?). The pom pom is our pesky period telling us to stop!

Here is what I use for students who are low vision to pair with the pictures, so they can make choices as well.

This is the cookie sheet idea I got from pinterest to say where all of my students are. There is one for therapy, one for library, one for gym, one for the kindergarten classroom, and one for cafeteria/recess. This cost less than $3. Tape, labels, magnets and a cookie sheet from the Dollar Tree. The pink is garage sale stickers (4).

Here is a dog I made from a tissue box to work on counting and fine motor. We fed the dog as many biscuits as we counted on large die after rolling it in a tub. Or, I have a generic "board game" I made where they will roll the die or use a spinner and practice counting using 1:1 correspondence and then if they land on a star spot they can feed the hungry dog. I put the laminated generic "board game"on a cookie sheet and use magnets as the pieces that the students move.

This is random but this is the pumpkin I carved for our pumpkin carving contest. I was proud of it so I have to share. I used squash as the skeleton head.

We all dressed like minions for halloween :-) Very easy group costume, just laminated the symbol, asked everyone to wear yellow and black suspenders and made the eyes from headbands, muffin liners and pom poms. All the kids recognized us and one of us was Dr. Gru.

Here is a visual schedule I made for circle time to keep everyone on task. I made it from a clipboard with storage I got at Target I believe. I used yellow electric tape and velcro. Picture symbols from boardmaker.

The flip side is the reward they get to choose at the beginning of the session to use as a behavior tool for some students.

The inside is where I kept all the unused symbols. Very quick and easy!

Here is a set up I used at my center during winter. I had a magnetic ice skating rink and light up stars hooked into a power link and on timed mode with two switches. I was working on students making choices and working two switches instead of just one. I have my PODD in the background as we would describe what we saw and our preferences. We also continue to do "yes" and "no" during these stations. The ice rink was a crowd pleaser as all the figures would move, the lights would light up and different songs would play. Hard to keep them from taking the pieces and worried about how small they were, so usually I would position them a bit further away. I got this for free at a garage sale when they said "if you can find all the pieces, you can have it". I searched for 20 minutes and found them all around the basement!

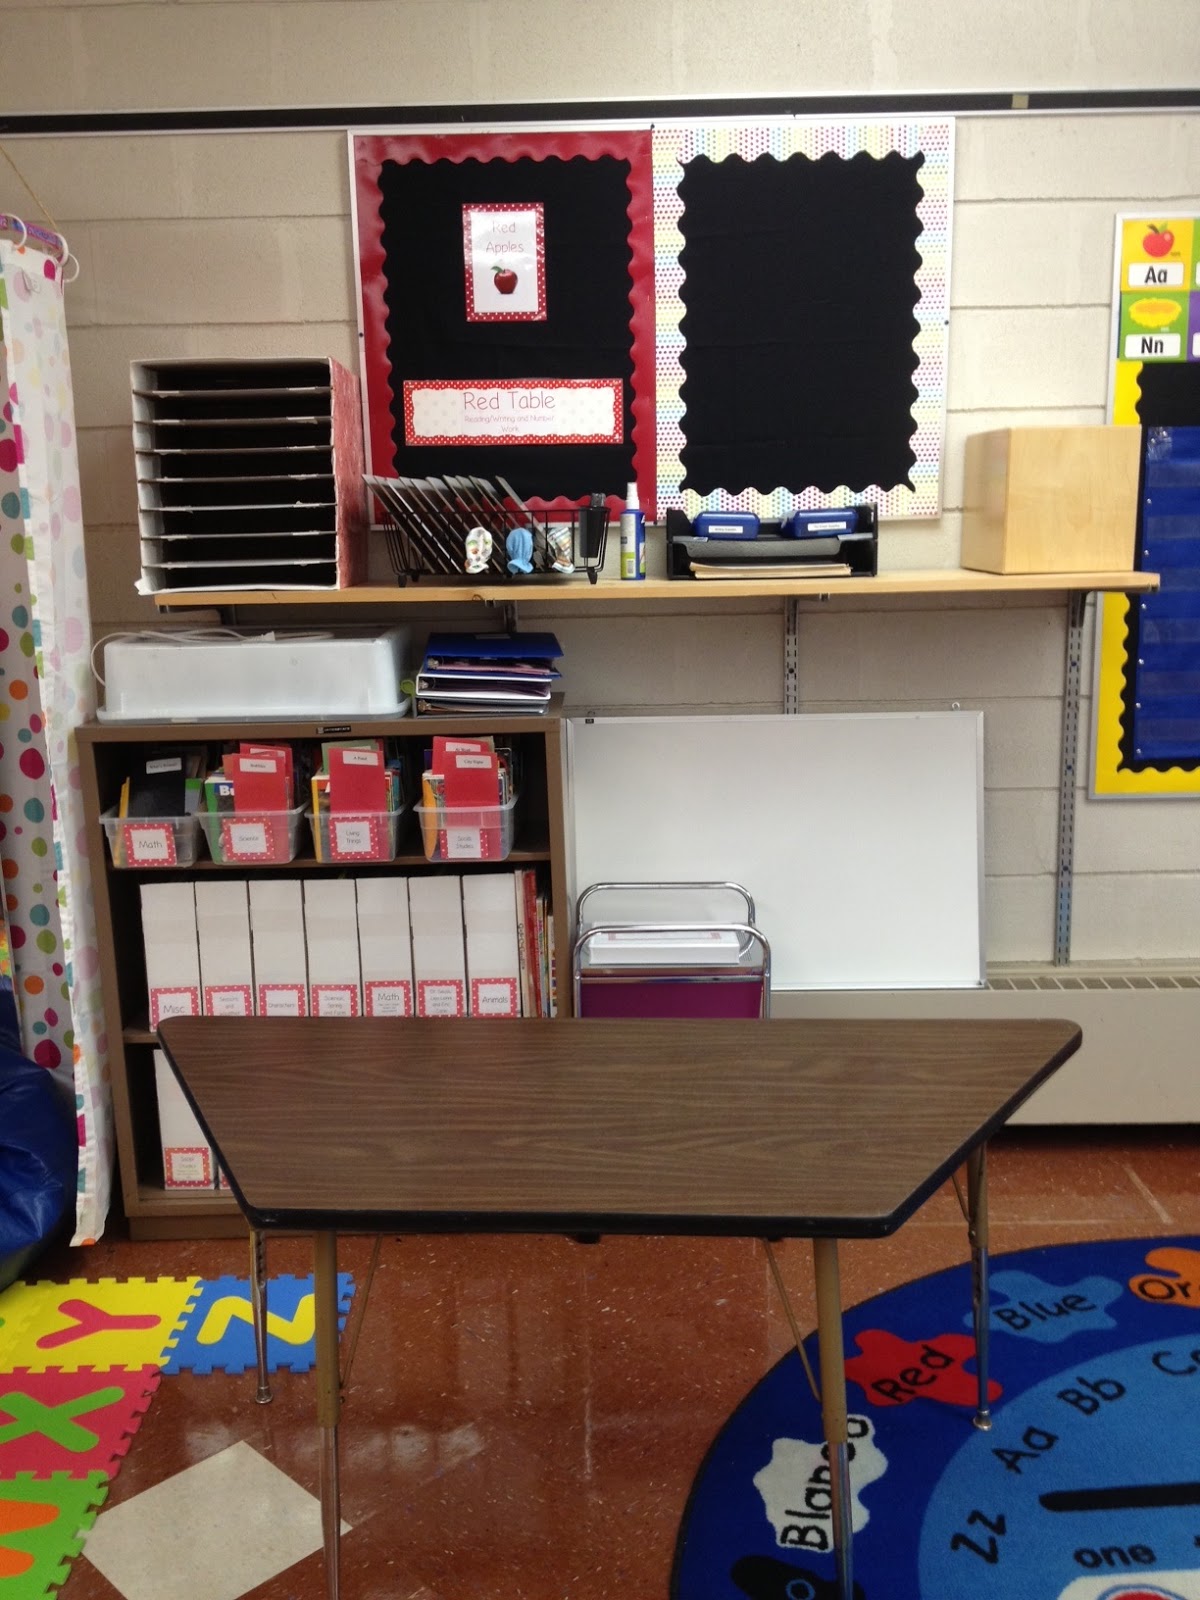
IEP BINS!!!! This was an exciting time around winter. We did a rotating schedule this year (see beginning of the year post). My co-teacher and I were always at the green and blue tables and our instructional assistants rotated each week between the red, orange and yellow tables (one was a floater/break relief). Each day, 2-3 students would go through each station in the AM and PM. For example, group A would go to the red table in the AM and PM Monday, the orange table for AM PM Tuesday, the yellow table for AM PM Wednesday, the green table for AM PM on Thursday and the blue table for AM PM on Friday. It worked out so well, I cannot praise this method enough. Everyone worked with each student and in group sizes that were manageable. Students worked with all adults to generalize their skills and did not get bored because of the variety. It was such a great way for my co-teacher and I to get IEP data on each kid, each week and for her and I to compare data on all our students (so we were responsible for both classroom students, not just our own). It was only for 30 minutes in the AM and PM so it was perfect timing. 
Now, onto what I was originally talking about-IEP Bins. Once we had written their IEPs and everyone's were done, we were able to make up data sheets for each objective and then pile the bins with things to work on for each objective. We left data collection just up to us so it wasn't too much for the adults to handle. It was nice because at the end of each day, we just rotated the bins to where the students would be the following day. There was no longer a need to come up with activities to do at your center because each student had an individualized bin with IEP work and individual work to give them. We had notebooks at each table so instructional assistants could note what they did and how it worked, or ask questions. We had a main sheet in each bin with what they are to do with each material, but we also left little notes on each item (for example-student it working on choice making, show them both items and see which one they reach for, or student is working on making marks on paper, use adapted writing equipment to see if student will mark on paper). Before IEP Bins we had a set activity they did at all the tables and they would repeat it 5 times throughout the week, but it was hard to meet every student's levels this way.

Here was a fine motor activity I put in a student bin. I got the cute clips at the Container Store.

This was an activity to use during our weather unit. Basic, I am sure everyone has seen it, but this is a way that I purchased a package of bulletin board items and used them in a hands-on way. I used a thick foam board and one side I left them choose the condition, then they could decide the temperature. We really focus on just because it is sunny does not mean it feels hot and just because it is rainy it does not mean it is cold, etc. We paired it with my thermometer that I have up on the board where they can find the degree (practice counting) and then the temperature is color coded (for example, 100 degrees is in the red part of the thermometer and it says "hot", cool temperatures are purple, cold are blue, etc.) My thermometer may be on another post!


On the other side is froggy, ready to get dressed. We do a whole dressing unit in the winter.


Here is just how I stored the items. In a little pocket notebook.

100th Day of School! Should be a holiday! ;-)
Here is how I taught my students about it. We counted 100, we felt 100 and we made 100. We also watched a video of kids doing things 100 times. Then, we practiced counting (I think I had it on a step-by-step switch and we took turns), then we felt 100 cubes. 

Then, we made 100, each student made 10 dots on the paper and we did it 10 times.

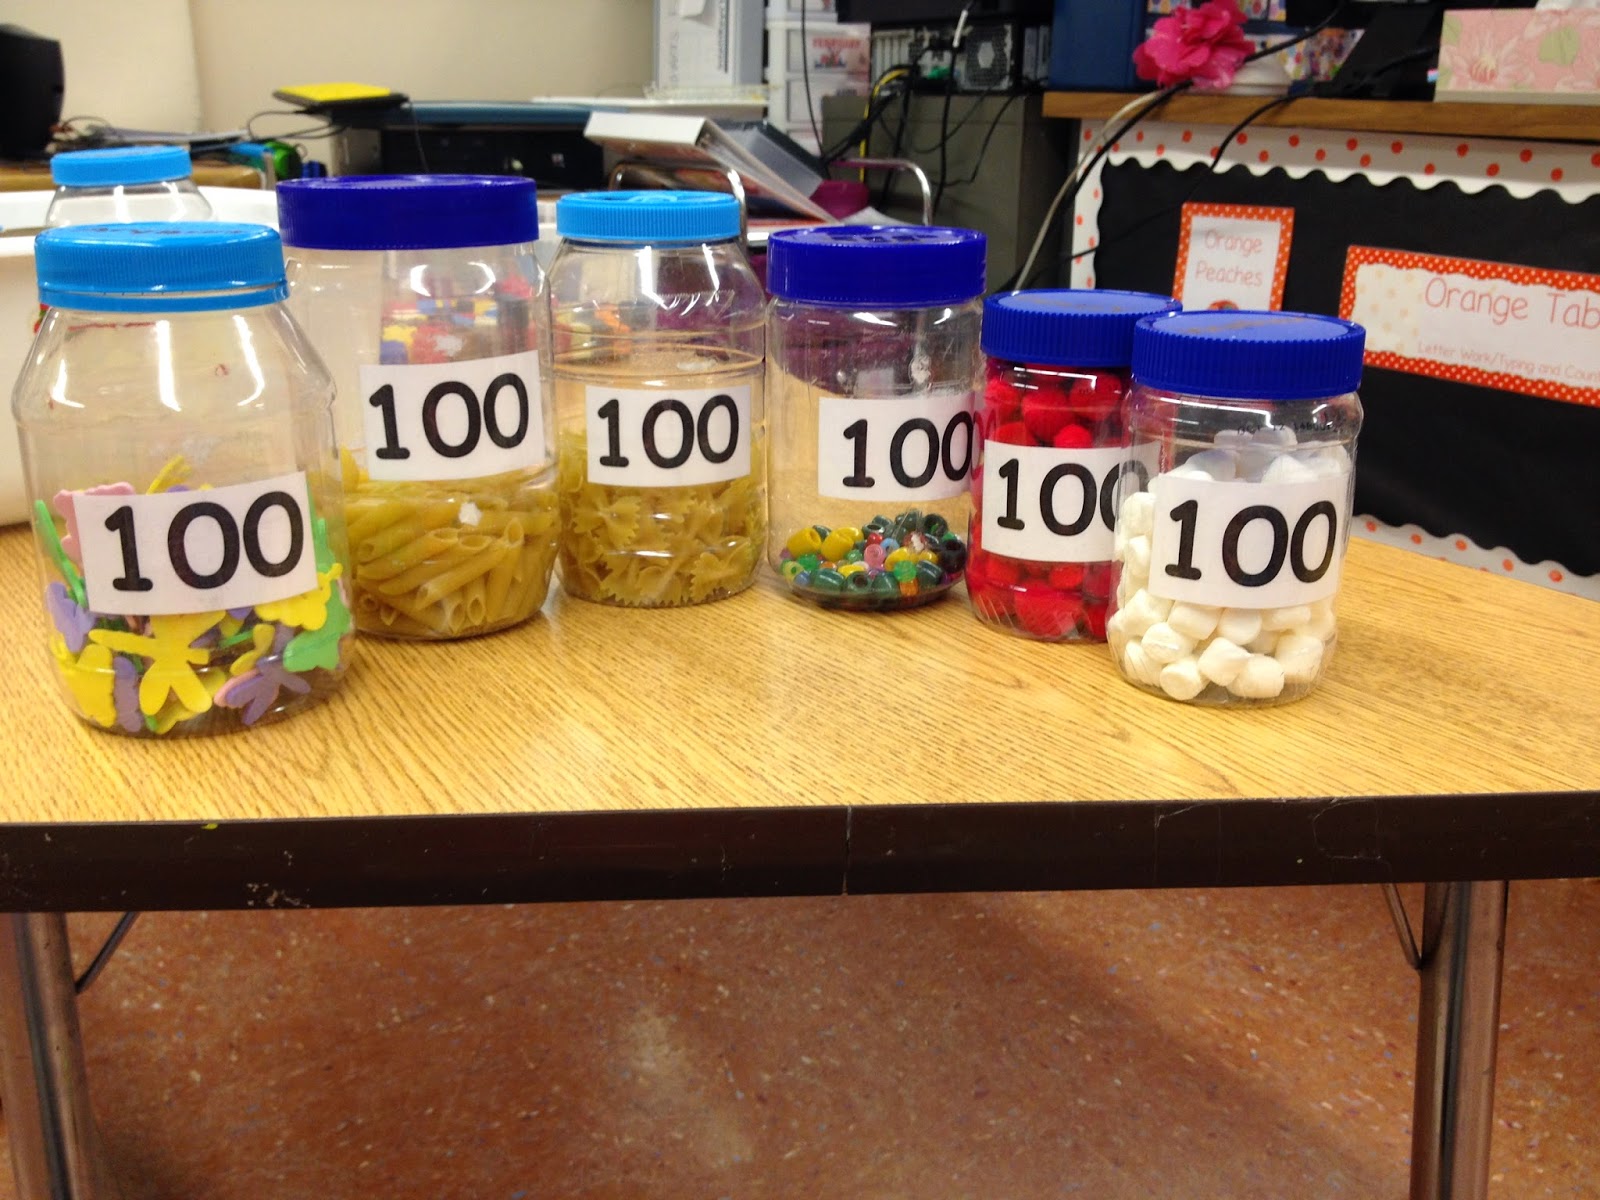
Then we all got to put 100 objects into a container. We did this during PM centers (sometimes we would all do the same thing if we had a good activity that needed small groups). In general, AM was reading and PM was math.

Valentine's Day Book Bag. I started doing these book bags to make my books tactile for my students. I put everything that is mentioned in the story in a bag and students attempt to find them, sequence the items, choose between two items, use "yes" "no", etc.

Here are the objects.

I apologize but all of these are upside down and I do not want to reload them. This is an example of my activities during reading circle (I co-teach and I teach reading. My co-teacher should start a blog about math because she has awesome ideas). My husband got me a foam alphabet mat as a surprise and I used the foam letters from them as a big, tactile letter to feel and trace when introducing the letter. I always have a letter choice during the week where students get to choose one object to interact with. We do a lot of choice making and hands-on activities because those are the levels of my students. This was a really good thing during circle because you get to observe a lot of behaviors of your students and find out their preferences and what they really like. For example, we found out throughout the year a student really loved birds and always chose anything with wings. How interesting!

Here are my letter tubs. The only thing is, the objects are sooooo small. I have decided for next year to make my own big tubs to include all of these things in for circle so I don't have to collect them on Monday of each week. I use the cheaptalk overlay for students to chose what they want to see from the tub. For my higher students we do where they pick what they want the other person to find. How interesting when you can't pick what you want but instead what the direction that was given to you!


Here is my amazing tactile alphabet book my wonderful student teacher made me as her goodbye gift to me. We had talked about it all year since our students were very mobile and wanting tactile learning opportunities and we found it hard to plan circle time. She did such a great job. It's a big book too.

Here is our "word wall" we make each week. They get to choose what they want to put up (I differentiate it, higher students have to think of something without any prompts and other students may choose between two pictures or objects). Then, we make a sentence about one of the cards on our word wall. We also research it if we are not sure what it is. This is where my wireless keyboard and mouse came in for use with the smartboard. I could turn on "google" and research it from circle time on the big smartboard. It was really interesting. Kids would love to watch videos of things in action.


Here is an example of how I help my students see their IEP goal progress when appropriate. I color code a graph and each time we take data they see where they are. Blue is in the sky, flying high (above goal), green is GOAL, yellow is seeing the sun, keep going, and red is hot lava, you want to get out of red! I decide what is red and yellow based on previous data points so it is reasonable for each student. They really did well with this. 

Here is a fun review game that we do, they pull a block out and tell me a letter and sound that they get. I threw a couple numbers in there :-) They enjoy this when I tell them to close their eyes and don't peek! Then, sometimes we will make CVC words with what they chose.
Here is how I modified the daily 5 for some of my students when appropriate. At my table, I would have them choose their Daily 5 task, then work with one student on IEP data collection while the other did an independent Daily 5 task  (at their level and individualized) and then we would switch.


Here they are matching, then finding the picture to go with it. The picture thing was very hard.

I would pull a themed book sleeve out for read to self. They really only looked at pictures but I would do a comprehension at the end "what was your book about?"

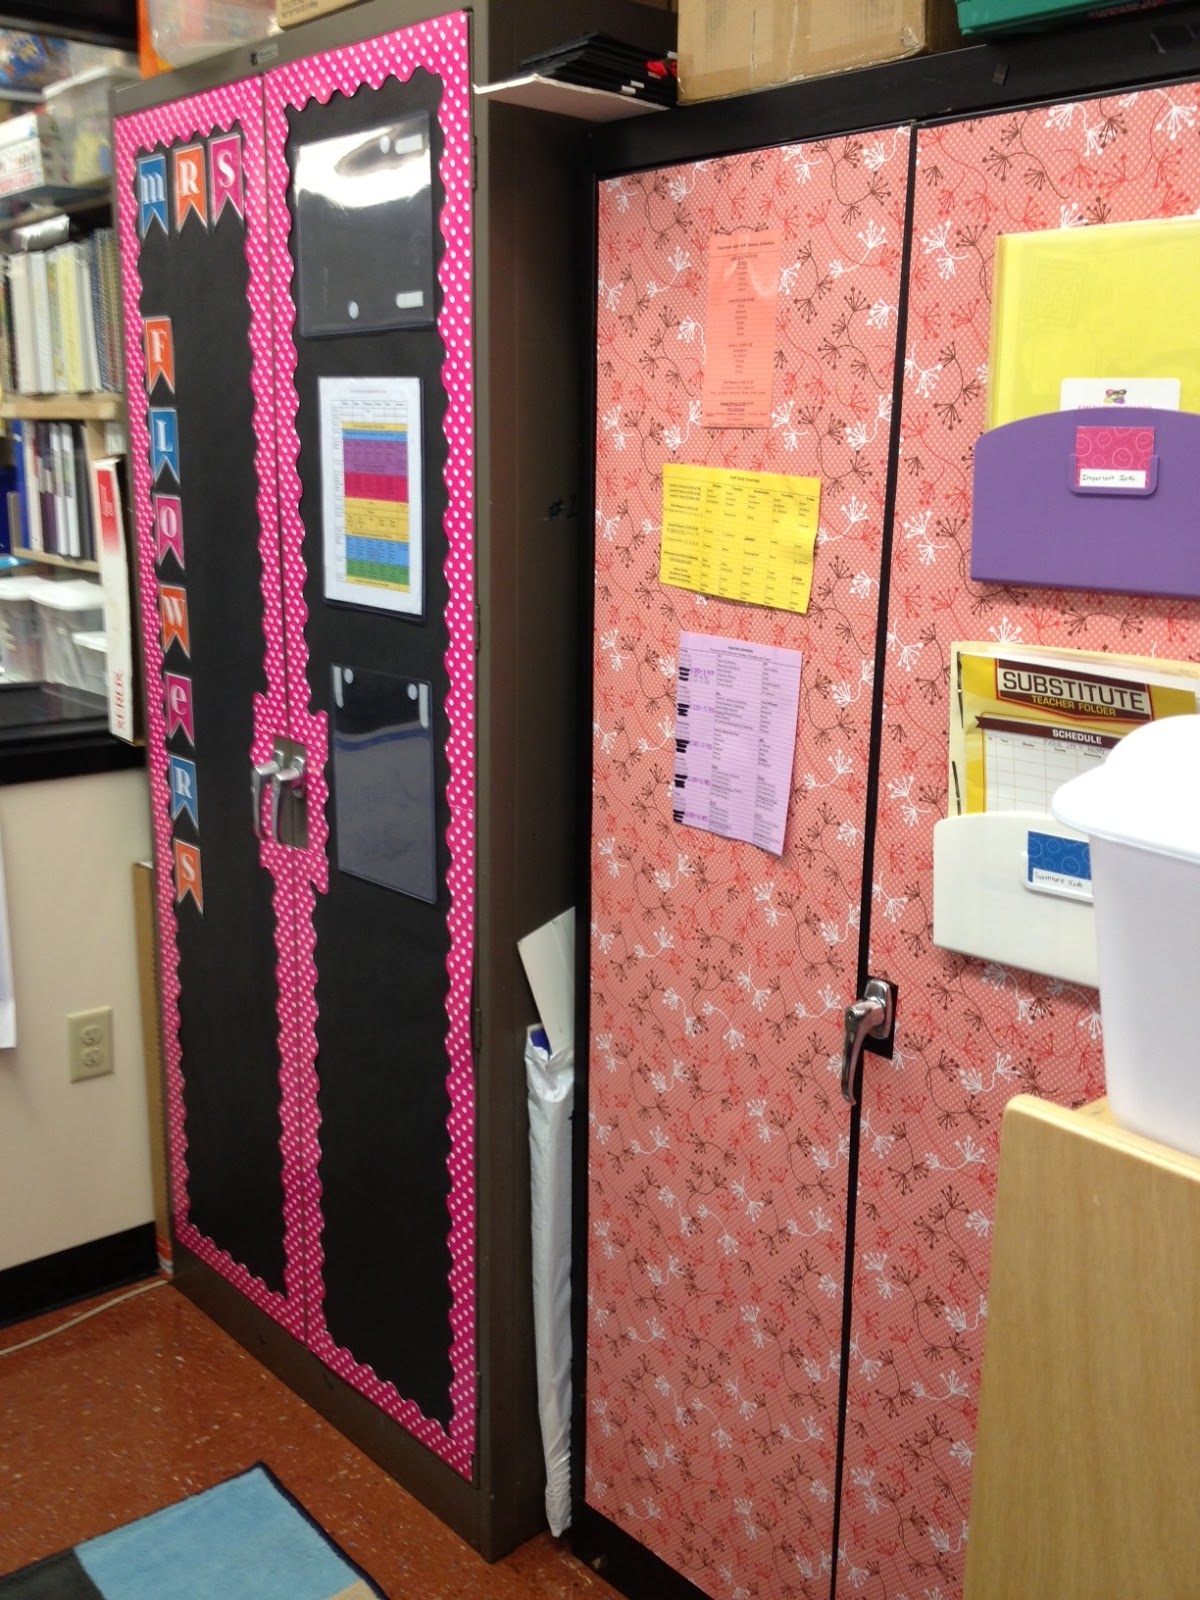
Just a reminder of our center rotation system. This is in a previous post. The clips are students names and the velcro is where instructional assistants names rotate. I was always at green and my co-teacher was always at blue. We are going to make some adjustments for next year but overall keep the center rotation.

And finally, just to brag about my amazing co-workers. Anyone in Ohio that was in Year 3 of the resident educator license does not need an explanation about this, but I found this on my desk after I submitted my RESA. I sincerely hope they change this for future teachers.

That's all for my year in a nutshell! I know it doesn't make up for being MIA for the past year, but I was really focused! Remember my goal for next year? Keep me on track!!
See you probably again this summer, or at least in August :-)

Saturday, November 9, 2013

Hands-on Activity Ideas

Hello!
It has been quite a while since my last post, but I have had a student teacher this semester and since I haven't been teaching, I haven't been documenting :-)
I do want to catch up before I begin teaching again and I will be posting more often (hopefully!). Todays post I want to go over a couple of activity ideas for hands-on learning because this year I have a lot of students that require hands on manipulatives to stay engaged on on task.

I will begin with something fun that I made that was under $20.00 and I made 3 of them! I made tactile sensory matching cards for students with low vision or that are hands-on learners. We have been brainstorming a lot this year to find appropriate activities for our students.
Here's what they look like. I bought small black cardstock and laminated it, then I purchased different textured paper and cut and hot glued in onto the cardstock. These ones feel like alligator, shiny, basketball, cork board...
And these ones are glitter, burlap, dots, leopard fuzzy and crimped. The last two have matching counterparts but for the sake of not having to take another picture I just put them together.

These will make a great activity for using hands purposefully, working with objects for a purpose, matching skills, visual and tactile learning, etc.

We also made these visual schedules for outside our classrooms. We are working a lot with our grade level teams in our PLCs (we call them TBTs) so we have different kiddos going different places all day. We keep this outside the door so that therapists, nurses, childcare attendants, etc. know where the kids are.

We made them for our rooms, kindergarten and pre-kindergarten. The cookie sheets were from the dollar tree. So cheap!

So, I can post pictures of some of these things later, but some activities we have been doing at our center time for hands on learning:

Reading: Tactile ABC pages, we made igloos out of cotton balls for I, we made newspaper collages for N, we are sticking flat lollipops on the page for L, we made a fuzzy cat for C, etc. We are trying to incorporate the common core standards extended with activities that are appropriate for our student's levels. 
Handwriting without tears, building with the wooden pieces, making marks on the smartboard
Using smartexchange, my student teacher has been trying to make reading cause/effect items with visuals and sounds for the letter of the week. 
Letter tubs: We have printed the items that are in the letter tub into a communication device so students can practice using communication devices to request preferred items.
For each letter of the week, we have two items to play with and have been using two switches to program those items so they begin to learn that hitting the switch has a purpose and a consequence for which toy you get to play with. 
We have been working on requesting "more" and "all done" or "yes" and "no" when listening to letter of the week songs or videos on the smartboard. 
For "Words Their Way" we have been doing a sort at one of our stations, usually a color sort, or a bumpy/smooth sort, or a pasta sort to begin sorting skills.
We have a word of the week that we practice saying with the switch and usually do a group writing about. For example, the word of the week is want, so we make a giant sentence strip and kids help put on "I want" then they can pick a picture or item to write about.

Math: We have a "color of the week" and we are almost done with that but we would do various color activities like using those colors on the lightbox, sorting the color and "not that color"
 Simple switch games, like we have a spinner that is switch activated to numbers 1-4 then we would practice counting 1-4 and feeding a toy dog that many biscuits or building a tower that high and having a switch toy knock it down. 
We have a counting jar so students can work on putting things into a container and taking things out, getting one thing at a time off the table. 
There is an interactive numeracy board where the students can put objects onto velcro to count out that number, they can make marks to tally the number, they practice giving the teacher a "high-three, or high-two (similar to high-five but with those fingers)", they practice putting the dots in a ten frame.
We have a big book for both math and reading where they can differentiate the letter or number of the week in different fonts and pull it off and put it on our letter/number of the week strip. 

Pictures to come!


Tuesday, August 13, 2013

Welcome to the 2013-2014 School Year!


Hello! I am so excited to have a new blog post before the beginning of the school year. I have been working very hard with my co-teacher to create a simple and easy classroom set-up as well as routines and procedures to begin the year with a solid plan. We are both special education teachers and will have 13 students between the two of us and 2 instructional assistants each, making 6 adults and 13 students. We teach kindergarten. We agreed that since we have involved students with many needs, small groups would be the best to spend a majority of the day. We are fortunate that we can be flexible because we have 6 adults! We know the benefits of inclusion as well as whole group, so we have incorporated a lot of that in our planning and want to tweak as the year goes by after we get to know our students.
To accomplish the small groups, we have broken our classroom into 5 sections, or tables. These are based on a color (red, orange, yellow, green and blue). Each table also has a food associated with it (apples, peaches, bananas, grapes and blueberries).  The food groups are called the "Home Base" groups which do not change throughout the year. One adult (and one table sharing an adult due to instructional assistant break schedules) will be assigned a food group and 2-3 students will as well. These groups will be at the appropriate colored table for their food for the entire year for "hello groups" (breakfast groups), science/social studies, and "goodbye groups" (snack/dismissal) (We call them hello and goodbye because some students don't eat regular food and have different feeding times so we will plan a hello or goodbye activity for them to participate in, instead of waiting around for peers to finish eating). Then, the colored tables will also be centers. Each table has 2 AM centers (reading/writing) and 1 PM center (math). Adults rotate the centers weekly (for example, if I was the red table one week, the following week I would be the orange table, seeing 2-3 kids Monday, 2-3 different kids Tuesday, 2-3 different kids Weds, 2-3 different kids Thursday and 2-3 different kids Friday-eventually seeing each student 1x/week assuming they are not absent any days). The two teachers (myself and my co-teacher) are always green and blue for everything (each day, each center) for simplicity sake, so instructional assistants rotate between red, orange and yellow. The students in each group change daily (stay at the same table in the AM and same in the PM for transition sake and then rotate to another color the following day). Whatever adult is at a table for the week they complete one activity 5 times with eventually all of the students. So, my co-teacher and I basically plan a red AM and PM center, an orange AM and PM center, and a yellow AM and PM center for the week and the kids rotate through. Less planning, all the students get to all of the material, you aren't running around a whole group making sure everyone completed everything, therapy pull-outs, etc.
It is helpful that my co-teacher and I are always green and blue and our time is "flexible" to allow for IEP data, assessments, possibly inclusion in typical kindergarten, etc). It may seem confusing but I have included a lot of pictures to help make it understood.
Welcome to our classrooms!


Here is the door where I will post bus numbers for both classrooms (because we will be in our "Home Base" food groups for snack/dismissal, students from both classrooms will be exiting down to the bus)

To the area directly to the right of the door I have created a "calm down corner" for students who are having trouble during the day. There is a small desk and a cart filled with individual work tasks (a lot of fine motor). I believe that students may need a break when experiencing behavioral issues but I also don't want that time to be too reinforcing (which is why I have the individual work tasks for them to complete). Still doing work, but able to talk it out, get a reminder of the expectations, learn how to try again, and regain their composure. The location also helps with students who enjoy flipping on and off the light switch :-)
To the right of the "calm down corner" is my SMARTboard area and you can also see the classroom library. I made a hula-hoop shower curtain reading area with a mirror and bean bags.


Right by the classroom library is our first center table! Home to the red apple table! As you can see, each table has a binder that clearly labels what the 2 AM center topics are and what the PM topic is. Each table also has a cart or drawers of some type, one drawer housing the feeding equipment (for the red apples hello and goodbye groups), one drawer housing AM center materials and one drawer housing PM center materials. The binder includes IEP goals for the topics for each student as well as alternate activities to do when plan A just doesn't seem to be working, which never happens ;-). All of the materials are kept by that center. For example, with this center, we made it close to the SMARTboard for writing work, close to the big dry erase and small dry erase boards, writing materials are right there on the shelf above, reading books/reading nook, etc. Oh, and number work has SMARTboard activities too!
To the right of the red table is my group center time. I am the group teacher for reading and my co-teacher is the group teacher for math. We will start off the day in her group area doing math tasks (calendar, who is here today, daily schedule, weather, number of the week, etc), then break into AM reading centers, go to my room for group reading (letter of the week, word of the week, alphabet, story of the week, etc), then go into AM writing centers, lunch/recess/specials, quiet sensory time, PM math centers, sci/social studies whole group (rotating between my co-teacher and I Mon-Thursday) then complete the task in small home base groups, then goodbye groups and home. On Friday instead of sci/social studies we do an inclusion activity with typical kindergarten and for the first couple months, a color parade around the school for the color of the week.
As you can see, since I am the reading group teacher, I have just reading things in my group circle. I have the alphabet, a pocket chart for letter of the week vocab, letter of the week, color of the week, word of the week, classroom rules. My big books are organized to the right with story props underneath and circle time supplies in the rolly cart. There is also an easel for stories and felt.


To the right of that is my exposed shelving, all cleaned up and organized with new labels! I wanted all the same bins so they stacked the same and all the same labels for easy access. The adults are the only ones grabbing these bins so they are just in writing and no pictures. The picture labels I did last year seemed cluttered and not very useful. It took just as long to look in the clear view so the labels weren't helpful. These are bigger and easier to read from a distance. I also put all the craft supplies to the left, math in the middle and reading to the right. On the top I have my fall, winter and spring/summer bins. Other storage too (fridge, swing, etc).


This is another angle next to the puzzles where the big toys are kept.


  To the right of that is dramatic play. Even that is organized!
To the right of that is the green table-my table! Instead of binders we have bulletin boards. You can see mine hanging. I also have the expectations hanging on a ring (the same for the classroom and all centers-4 simple rules) and a magnetic timer for data. We will have IEP binders for each students with data sheets in them so blue and green tables will use those.
Here is a close up-I made the clipboards with printed duck tape.
The back of our clipboards and the back of the binders have the same behavior chart on them for the use in small group time. We made it simple because each kids consequence and reward is so different. All of the students velcro names are located at the center so once you begin your center you can say hello, find names, put them on the group names section, review rules and behavior plan, etc.

On both of the barn doors (left open because we are using both rooms this year) to the right of my green table are a space saver pocket chart from Lakeshore (love the size-it was perfect for my things!) I have our color of the week, our theme of the week and a place to post my essential questions based on common core extended standards. We have already gone through and made a theme and book for each week and the colors go for a couple months then we are toying with the idea of doing shapes of the week. On the other door is a home base chart. Remember, these do not change throughout the year so they are just posted here.

To the right of that is my student computer station. We are supposed to get new computers before school starts-keeping my fingers crossed! I have everything out, intellikeys, EZ keys, speakers, etc.


To the right of that, behind my teacher desk is the orange table. This table is reading center letter work, then writing center typing and then math center counting. So, my classroom has the red table, green table and orange table. The yellow table and blue table are in my co-teacher's classroom which is semi-open to my room with the barn doors. 


Here is my teacher area. It has a semi-private entrance off the cubby area so students won't be tempted to come inside. Two big filing cabinets line the inside (I should have taken pictures of how I organized them! next post...) and they have different schedules and information posted on the outside. I have my monthly lesson plans by the printer. 

Then, here is the cubby and sink area next to the door. Now you have seen the entire classroom!


Here is my co-teachers classroom. She hasn't set up everything yet but she has an amazing group area space for math group time in the morning! That chart you see in the background is our daily and weekly center rotation (see close up below)


She doesn't have her blue table set up yet but here is her clipboard.


Here is the yellow table. This table is my favorite because it is listening and sensory. My co-teacher has the most excellent sensory tools, light boxes, visual stimulation, switches, etc. etc. etc. 


Here is our center rotation board. The clothespins are students names that rotate daily. The colored boxes refer to the colored table. The top half is AM, the bottom half is PM. Once we figure out which IA is where, we will fill in with velcro names the red, orange and yellow and rotate those weekly. We are also going to add break times to this as well.

I hope you enjoyed my classroom tour! I have been so excited to post this. Please let me know if you have any questions and please comment! I love comments :-)

Here's to an excellent school year and best of luck to my fellow teachers!